Notifications add value to an app, by helping to build conversations between users. They can also help make an interface less hostile by sharing important information. And it’s because they’re so useful, that you’re being flooded by feature requests that are asking for notifications to be added to your app. Now (please).
However because of the noise, it’s hard to set aside the time to figure out the necessary requirements: does it need an opt-in and opt-out feature? Audience segmentation? Personalization?
The work involved just keeps piling up.
The good news is that in-app notifications (the kind of notifications that give useful information on screen after a change or event), are easy to handle with a reliable rich text editor such as TinyMCE. The editor has a notifications API that can communicate vital information to the user, and is easy and quick to set up. In this article, you'll find a guide on how to set up and manage notifications in the TinyMCE rich text editor, with NotificationManager API.
Setting up TinyMCE instance
Before you can implement notifications, you need to create a sample project and create a TinyMCE editor.
To do so, open up the terminal, navigate to a path of your choice, and run the following commands to create a project directory (tiny-mce-notifications):
mkdir tiny-mce-notifications
cd tiny-mce-notificationsNext, you need to install the TinyMCE NPM package by running the following commands in the terminal:
npm install tinymce
Create an index.html file, in which you'll be implementing the TinyMCE editor, by running the following commands:
touch index.htmlNext, open the index.html file and add the following code to it:
<!DOCTYPE html>
<html lang="en">
  <head>
    <meta charset="UTF-8" />
    <meta http-equiv="X-UA-Compatible" content="IE=edge" />
    <meta name="viewport" content="width=device-width, initial-scale=1.0" />
    <title>TinyMCE</title>
    <!-- 1 -->
    <script src="/node_modules/tinymce/tinymce.min.js"></script>
    <style>
      body {
        margin: 4rem auto;
        max-width: 760px;
        font-family: system-ui;
      }
    </style>
  </head>

  <body>
    <h1>TinyMCE Editor</h1>
    <!-- 2 -->
    <textarea id="my-textarea"></textarea>
  </body>

  <script>
    // 3
    tinymce.init({
      selector: "textarea#my-textarea",
    });
  </script>
</html>In the above code:
- You include the tinymce.min.js file from the node_modules directory using the script tag. You can also include TinyMCE directly from the CDN.
- You add a textarea element and give it an ID (my-textarea), which will be used by the TinyMCE instance.
- You initialize the TinyMCE (init) instance by providing it with a selector attribute (textarea#my-textarea), which is used to select the textarea with ID my-textarea.
Finally, start a live server in VS Code or by using the serve command from the terminal and visit the associated localhost URL.
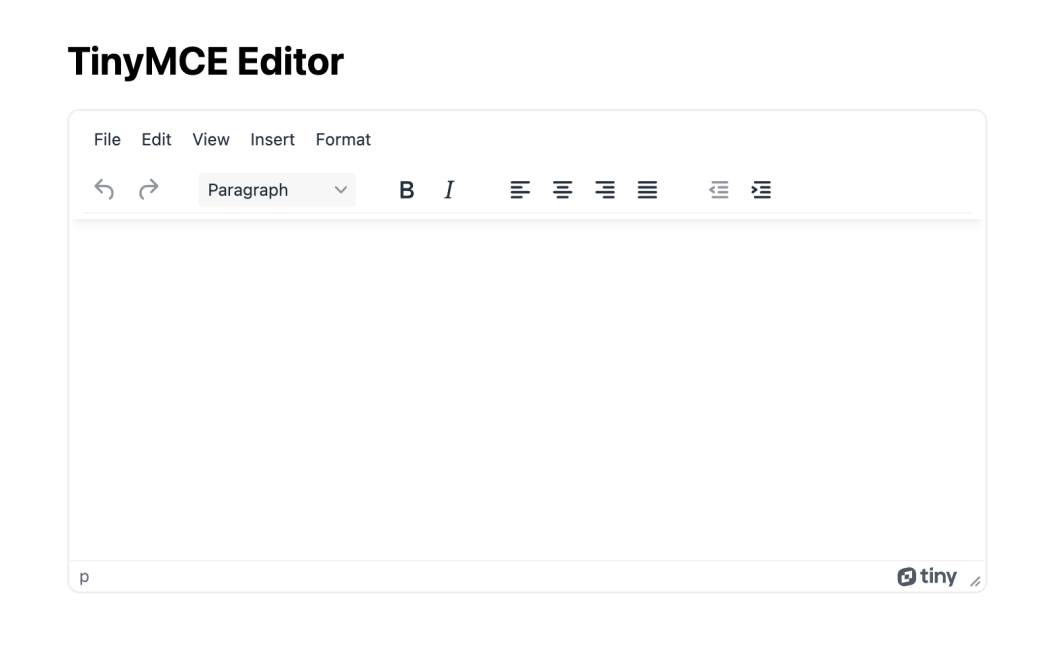
You can see that the editor is working. Now you can implement notifications in the editor.
Using NotificationManager API
TinyMCE provides a NotificationManager API that allows you to create, close, and get information about the notifications in the TinyMCE rich text editor. With the help of this API, you can provide the user with feedback about actions that they've taken in the editor.
The NotificationManager API comes with several TinyMCE API methods that allow you to control the behavior of notifications in the editor.
Creating a notification
NotificationManager API provides you with an open method to create a notification.
To create a simple notification, update the index.html file by adding the following code:
<body>
  ...
  <br />
  <p>Custom Actions</p>
  <button onclick="showNotification()">Show Notification</button>
</body>Next, under the script tag in the index.html file, add the showNotification function with the following code:
<script>
  ...
  function showNotification() {
    const notification = tinymce.activeEditor.notificationManager.open({
      text: "A custom notification",
    });
  }
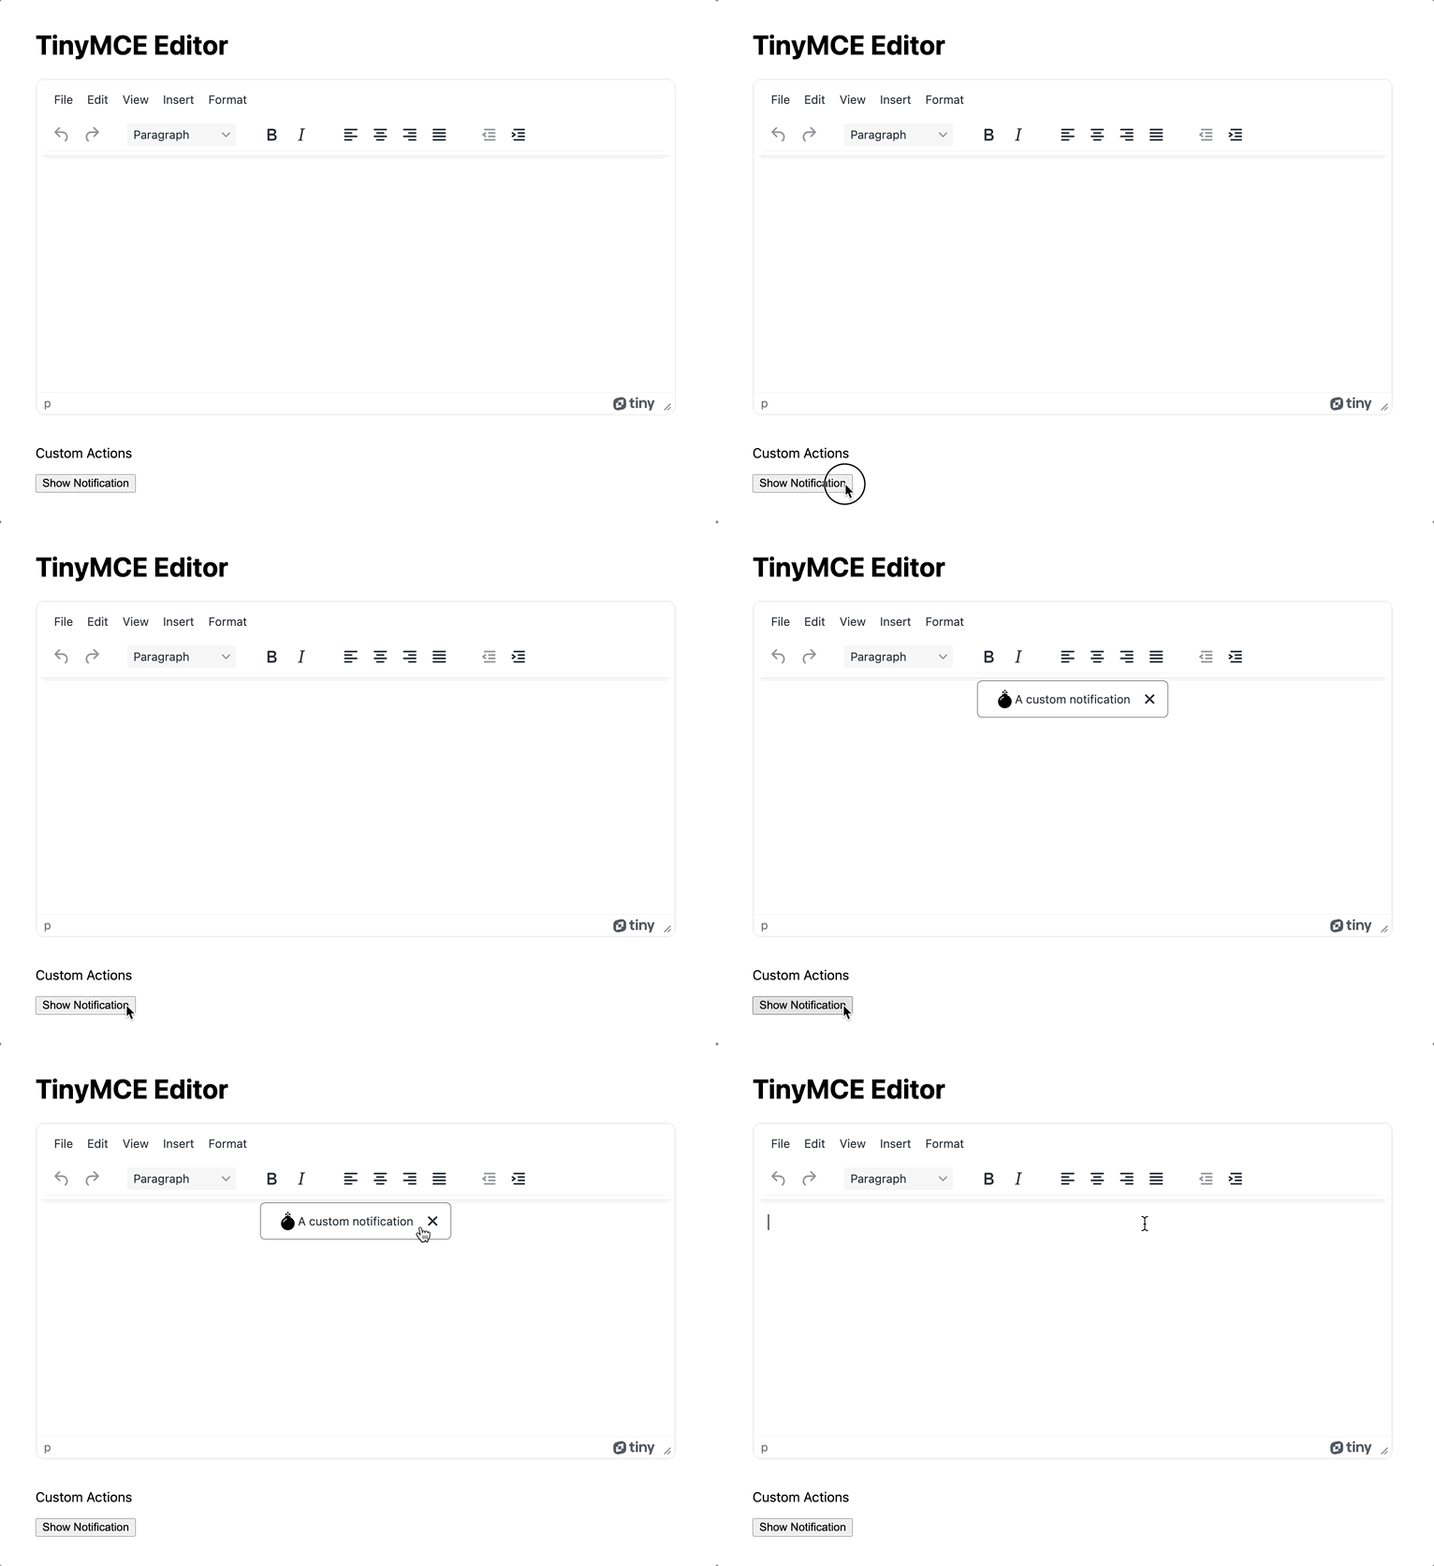
</script>In the showNotification function, you refer to the TinyMCE editor (tinymce.activeEditor) and call the NotificationManager (notificationManager) API's open method, to which you can pass an object containing the text property. The text property defines the message for the notification.
Save your progress and visit the localhost URL to test the showNotification function.
Configuring a notification’s type
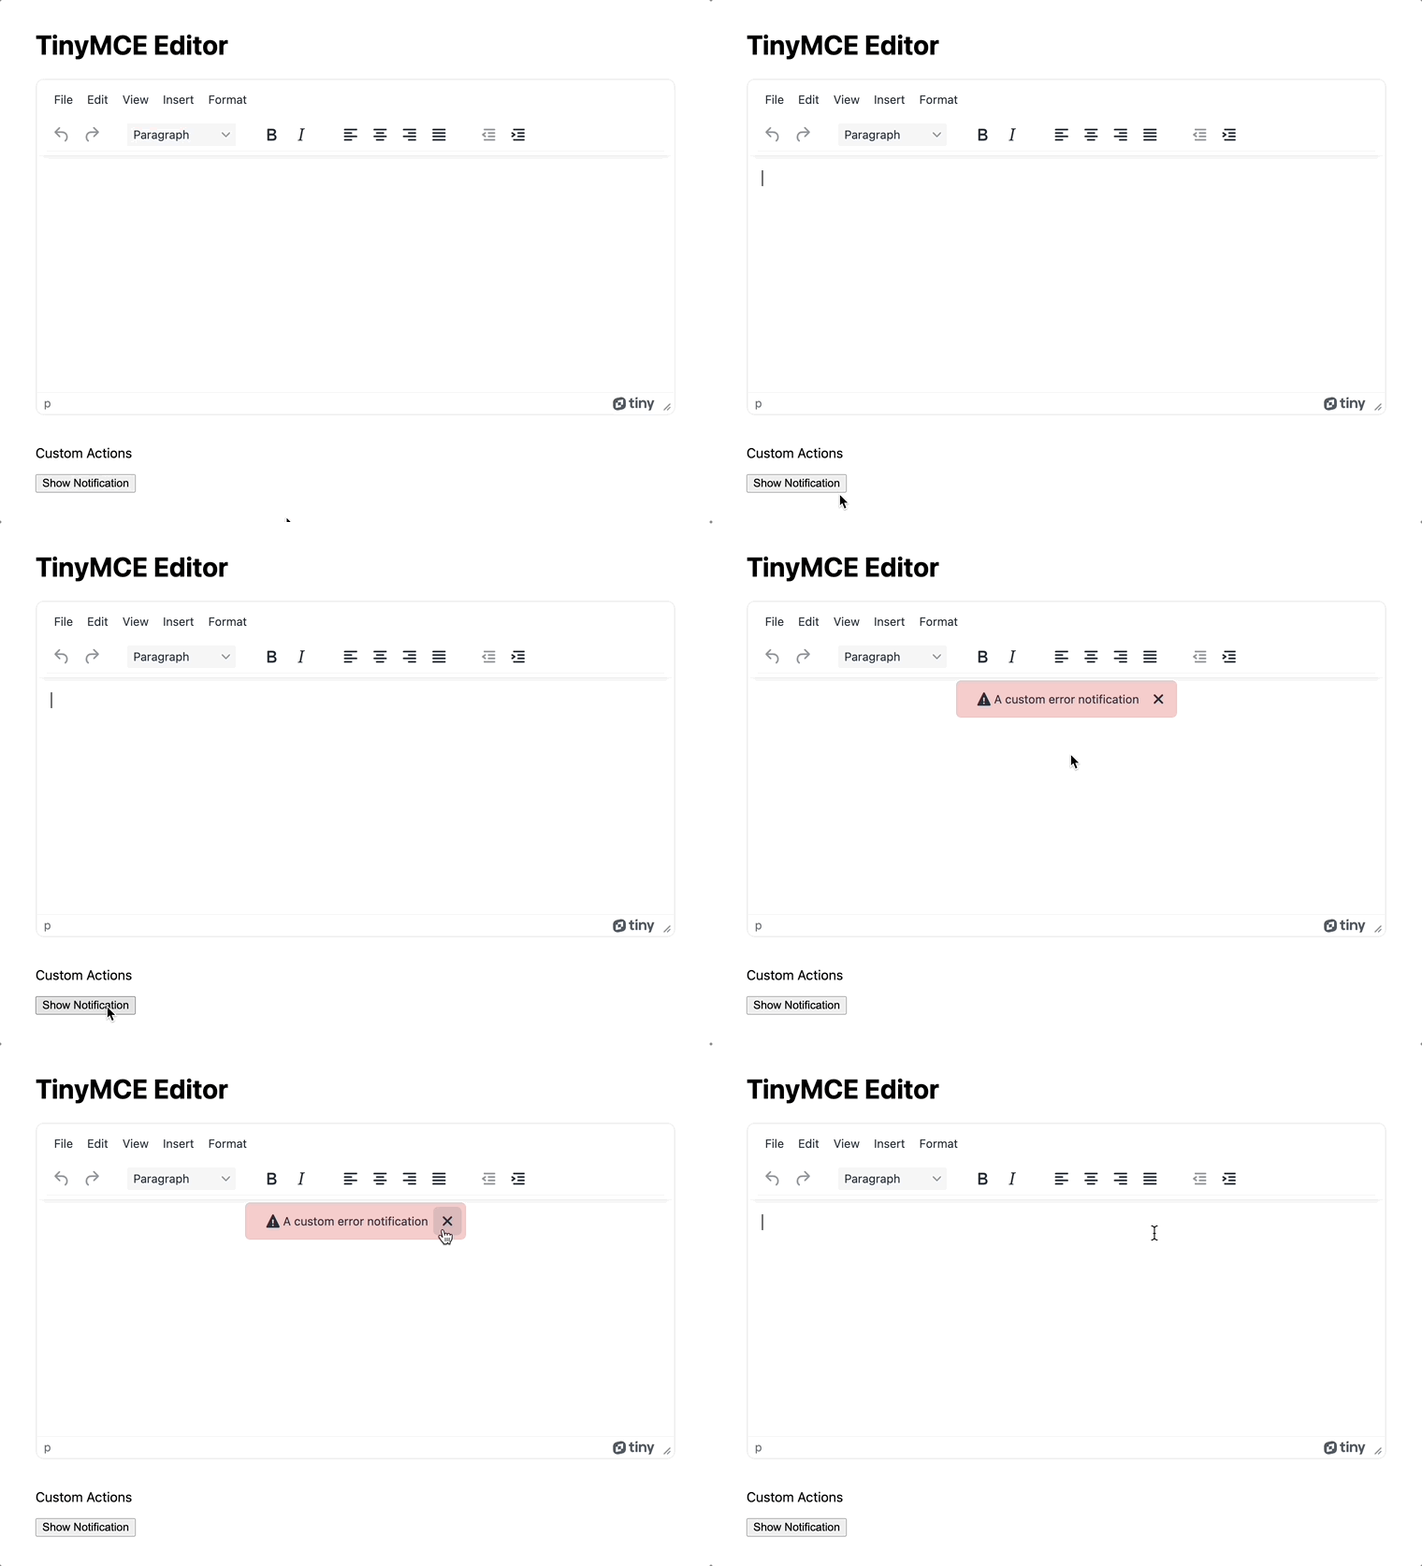
You can configure the notification’s type by passing the type property to the openmethod. Types of notifications can include success, error, warning, or info.
To customize the notification type, update the showNotification function as shown in the following code:
<script>
  ...
  function showNotification() {
    const notification = tinymce.activeEditor.notificationManager.open({
      text: "A custom error notification",
      type: "error",
    });
  }
</script>Save your progress and visit the localhost URL to test the type property.
Customizing a notification’s icon
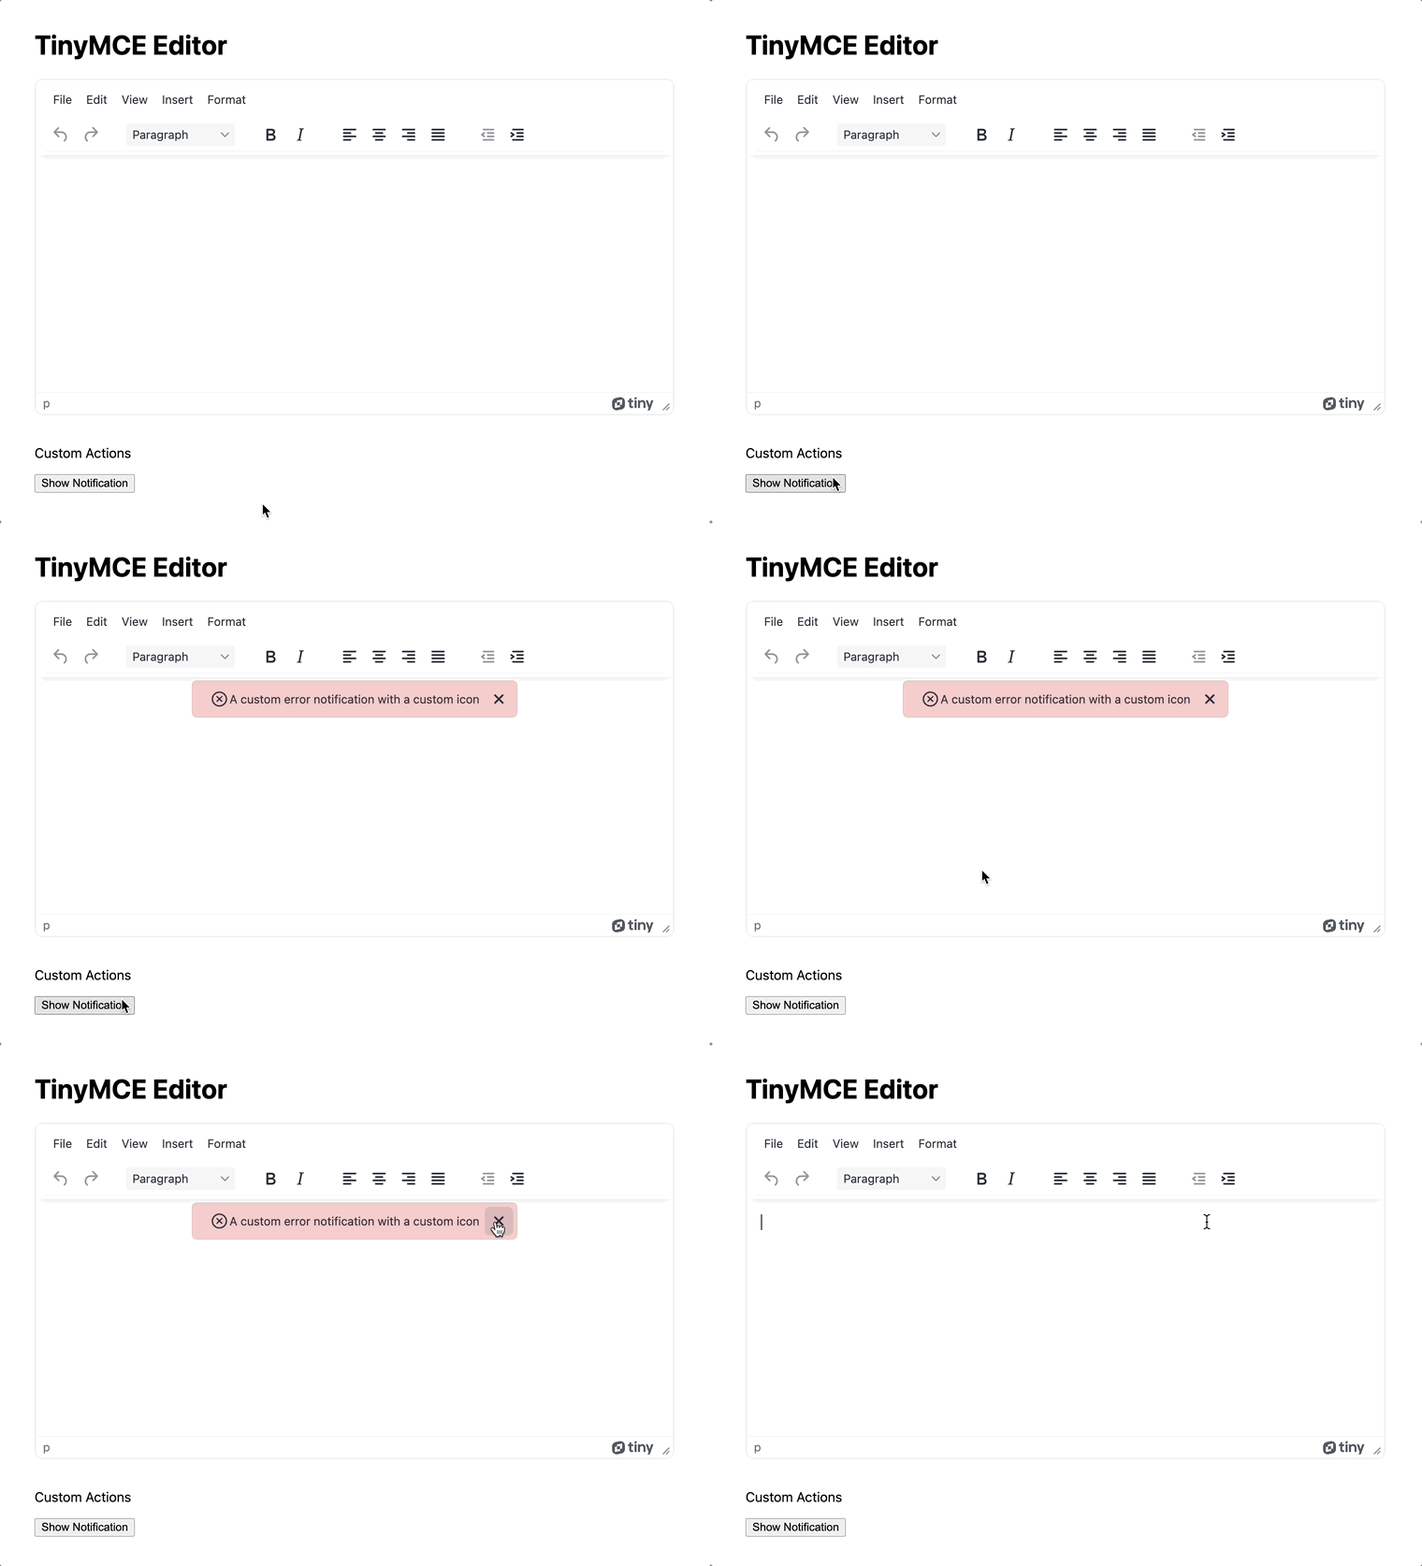
You can also customize the notification’s icon. Choose an icon from the list of available icons, and pass the icon property to the open method.
To customize the icon, update the showNotification function as shown in the following code:
<script>
 ...
 function showNotification() {
   const notification = tinymce.activeEditor.notificationManager.open({
     text: "A custom error notification with a custom icon",
     type: "error",
     icon: "cancel",
   });
 }
</script>

<p data-line="158" class="sync-line" style="margin:0;"></p>Save your progress and visit the localhost URL to test the icon property.
Auto-hiding notifications
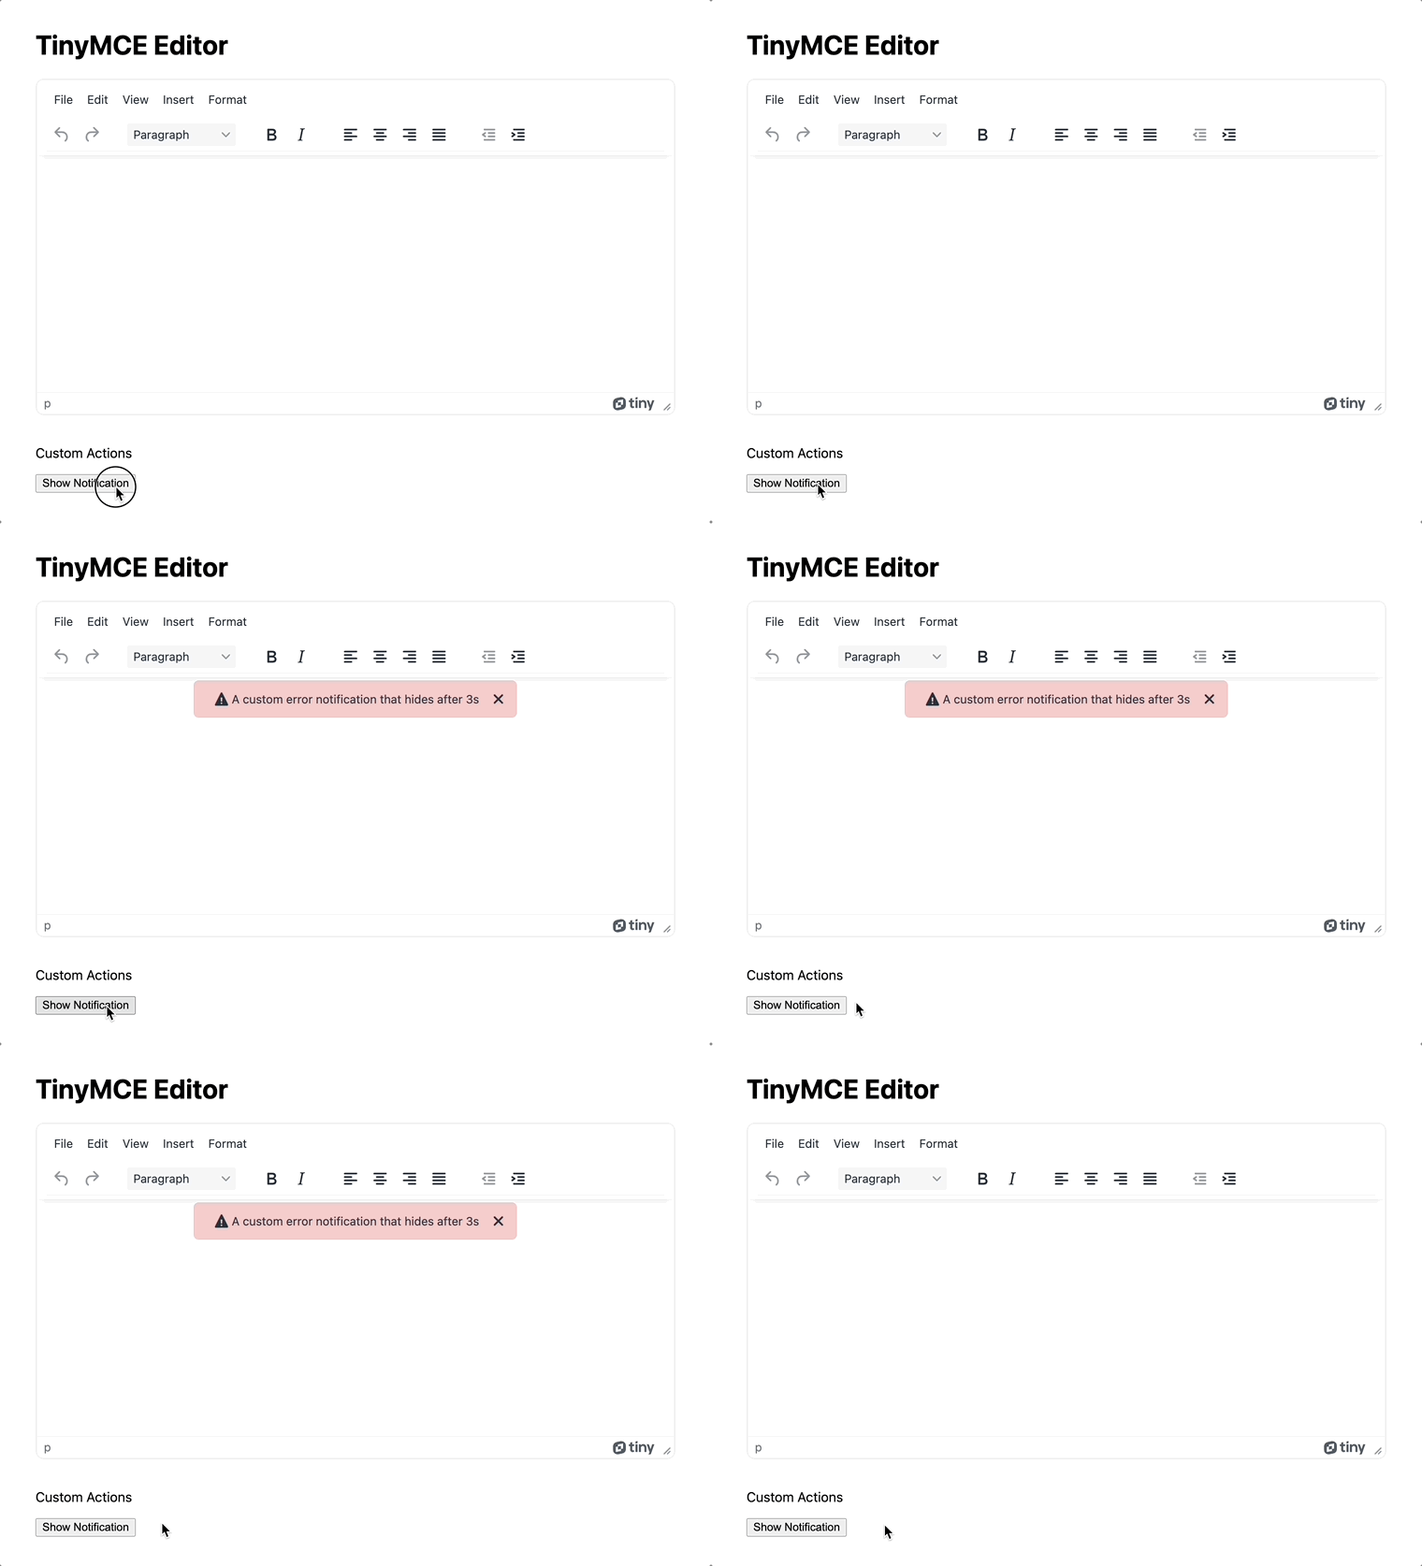
You can also hide notifications automatically by providing the open method with a timeout property. The time specified in the timeout property is specified in milliseconds.
To create an auto-closing notification, update the showNotification function as shown in the following code:
<script>
  ...
  function showNotification() {
    const notification = tinymce.activeEditor.notificationManager.open({
      text: "A custom error notification that hides after 3s",
      type: "error",
      timeout: 3000,
    });
  }
</script>


<p data-line="181" class="sync-line" style="margin:0;"></p>Save your progress and visit the localhost URL to test the timeout function:
Hiding the close button on a notification
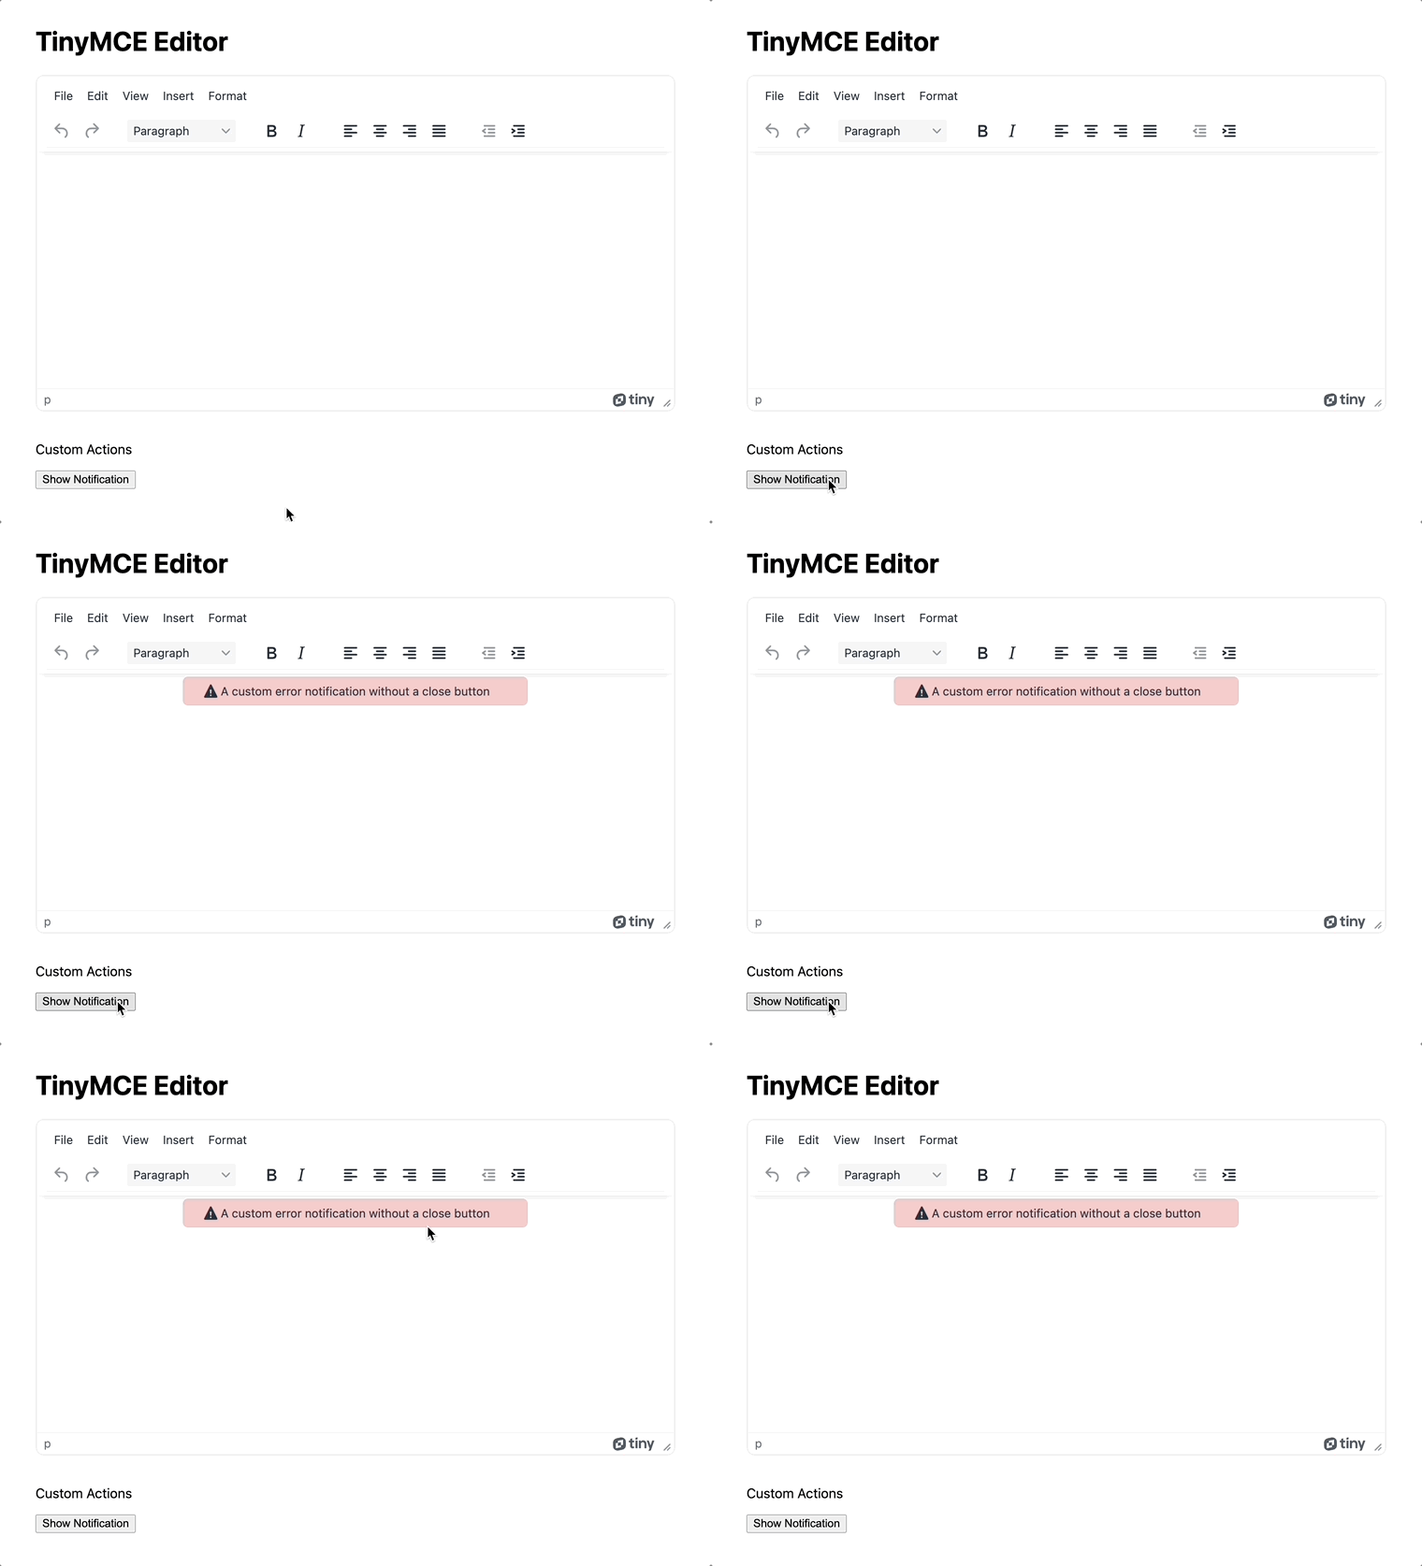
Sometimes, you may want to display a notification that the user is unable to hide. To achieve this, you can pass a closeButton property to the open method.
To create a notification without the close button, update the showNotification function as shown in the following code:
<script>
  ...
  function showNotification() {
    const notification = tinymce.activeEditor.notificationManager.open({
      text: "A custom error notification without a close button",
      type: "error",
      closeButton: false,
    });
  }
</script>


<p data-line="204" class="sync-line" style="margin:0;"></p>Save your progress and visit the localhost URL to see that the notification no longer has a close button.
Closing a notification
Although users can usually close the notification manually, sometimes you might want to close the notification programmatically. For example, in a rich text editor, you may allow users to post only PNG images. However, a user may upload images in other formats. To handle this, you can create a custom notification asking the user to remove all the non-PNG images. Once the user removes the noncompliant images, you can call the code to close the notification.
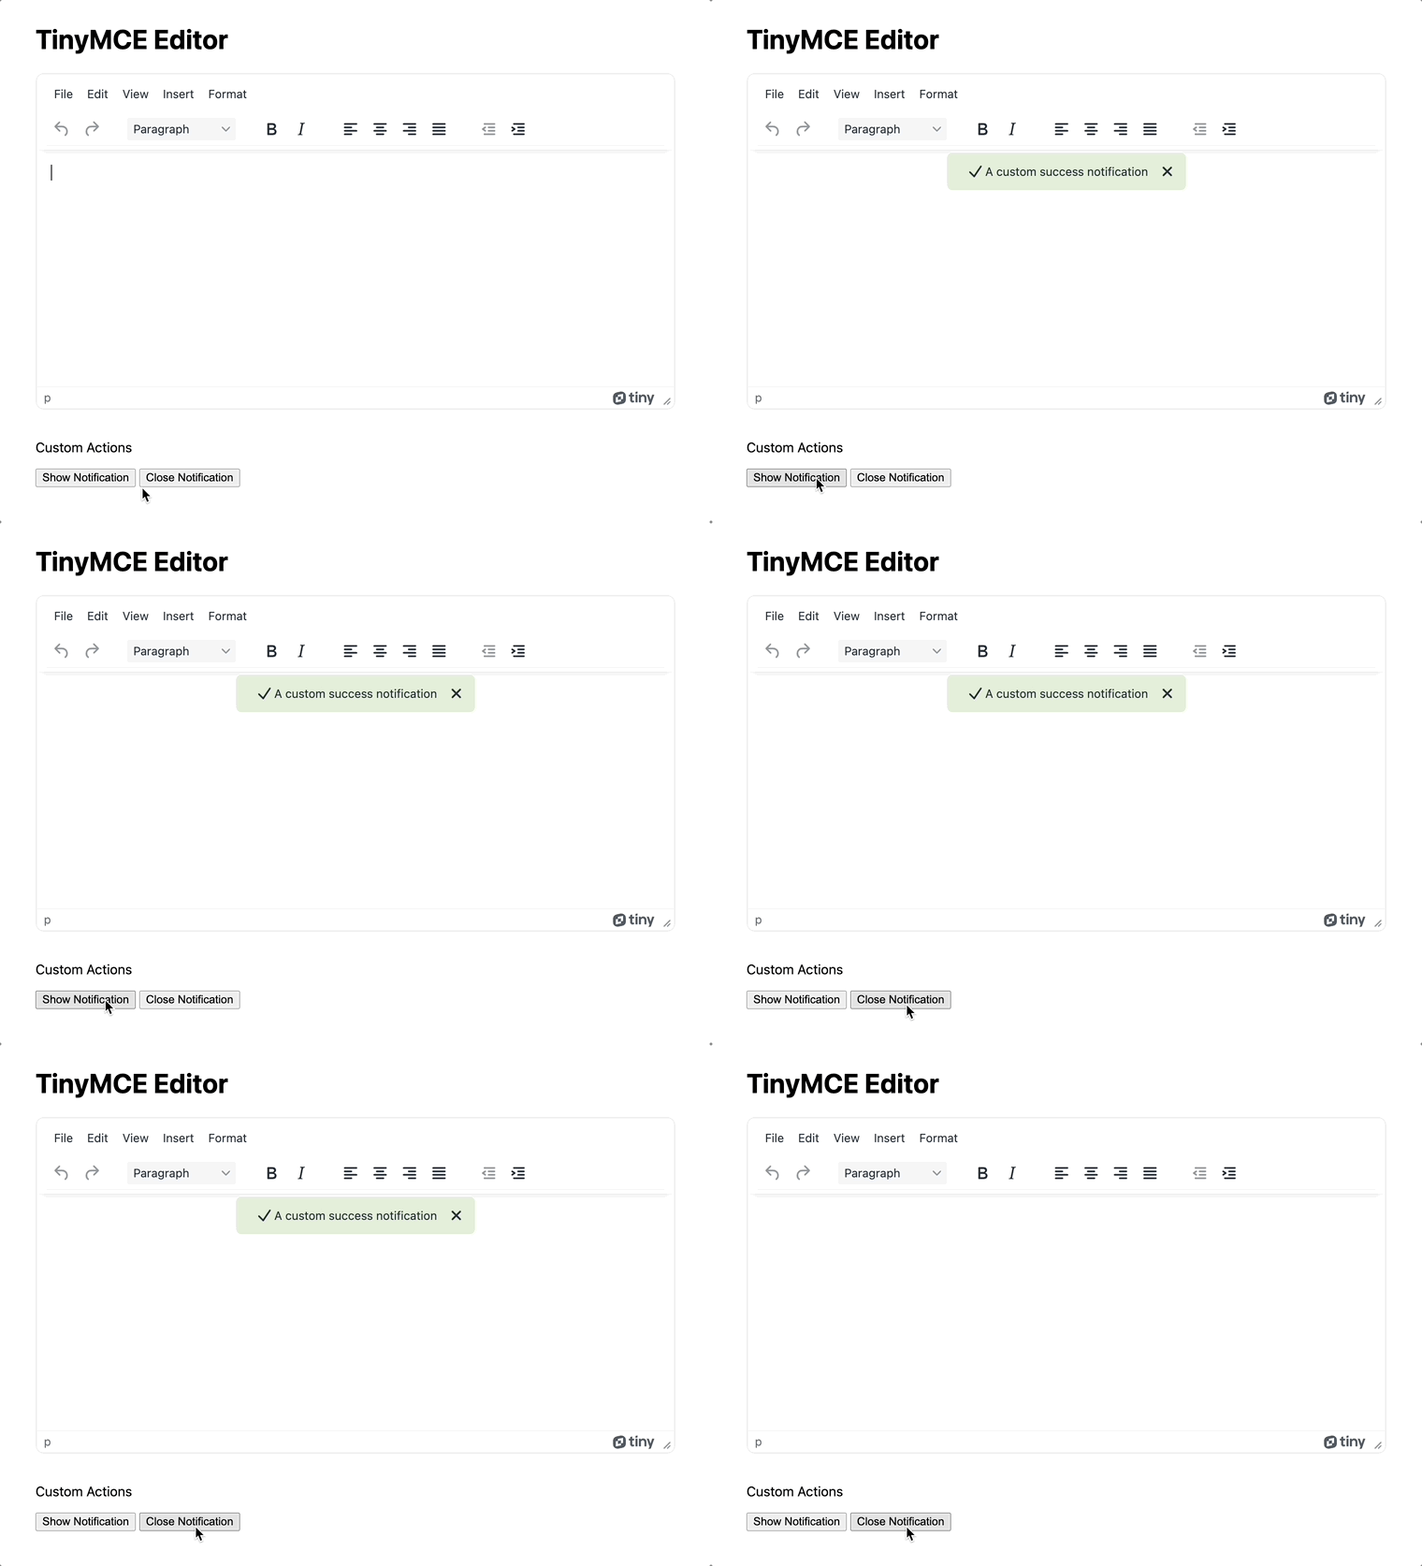
To close the notifications programmatically in TinyMCE editor, you can use the close method from the Notification Manager API.
To see how to close a notification, first, update the index.html file by adding the button to close the notification:
<body>
  ...
  <br />
  <p>Custom Actions</p>
  <button onclick="showNotification()">Show Notification</button>
  <button onclick="closeNotification()">Close Notification</button>
</body>


<p data-line="226" class="sync-line" style="margin:0;"></p>Next, add the closeNotification function under the script tag in the index.html file, as shown in the following code:
<script>
  ...
  function closeNotification() {
    tinymce.activeEditor.notificationManager.close();
  }
</script>


<p data-line="237" class="sync-line" style="margin:0;"></p>In the above code, you define a closeNotification function, in which you refer to the TinyMCE editor (tinymce.activeEditor), and call the NotificationManager (notificationManager) API's close method.
Save your progress and visit the localhost URL to test the closeNotification function:
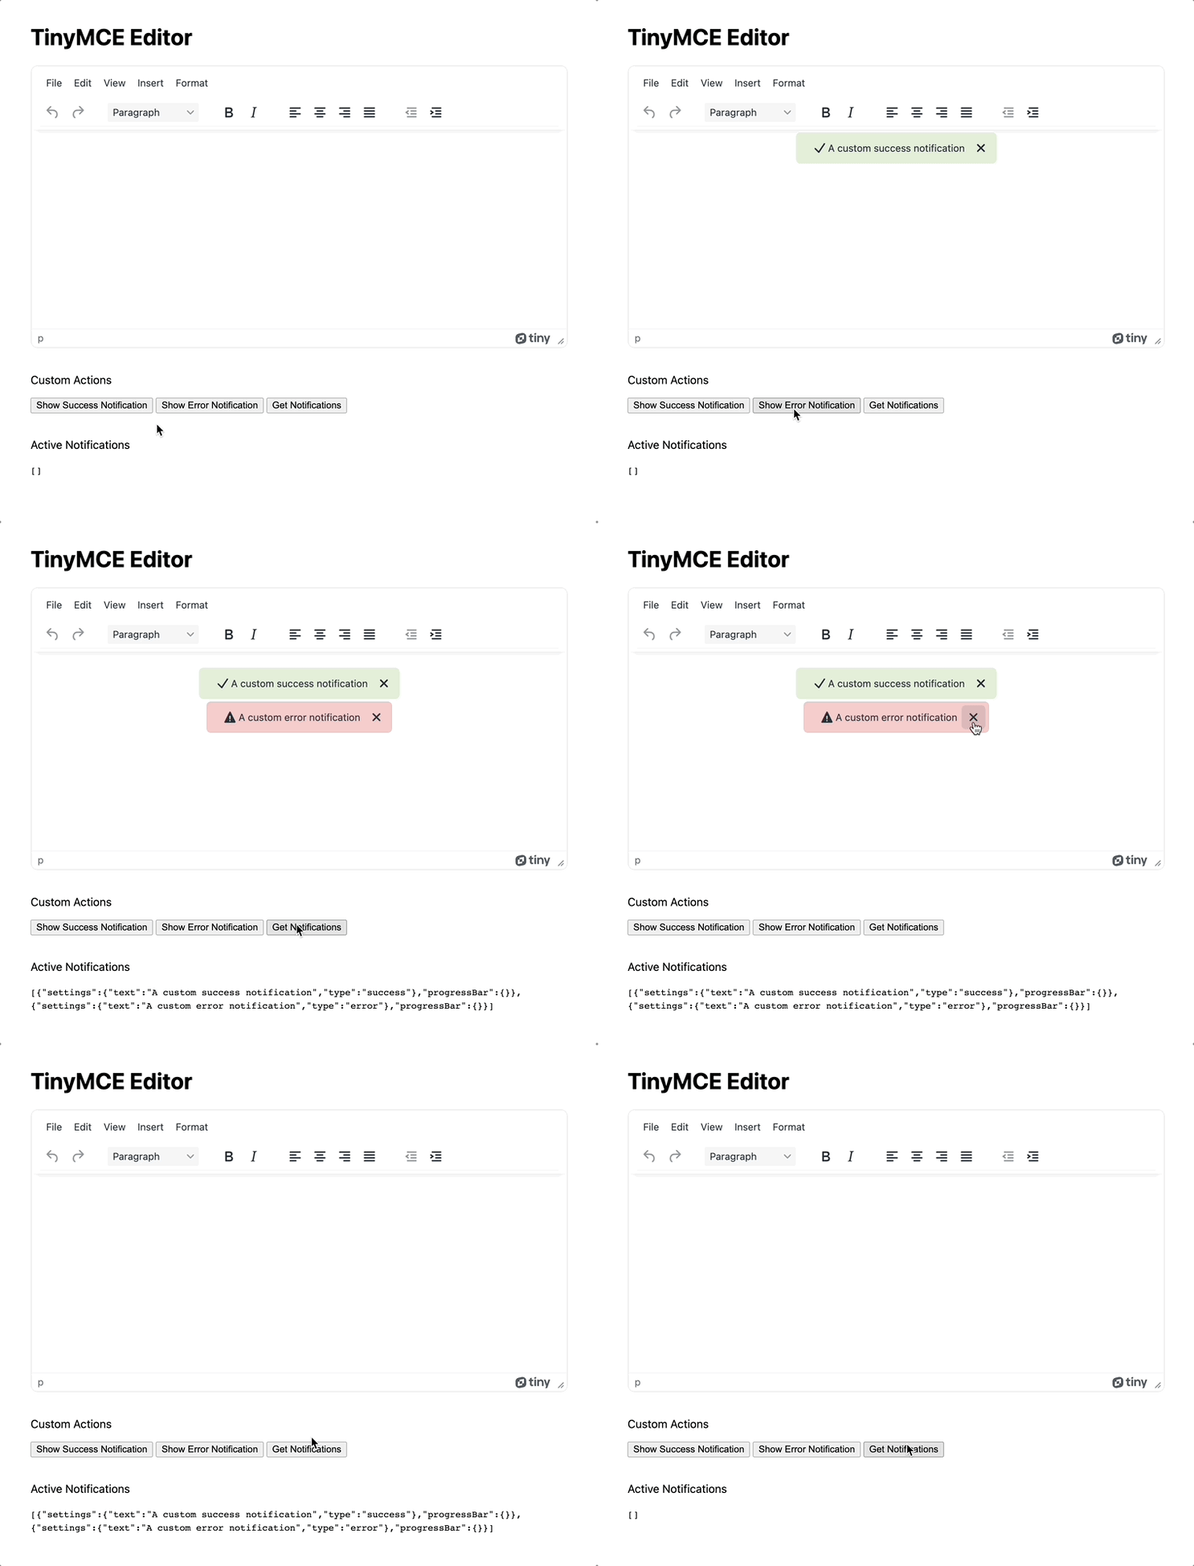
Getting active notifications
To get the currently active notifications, you can use the getNotifications method from the NotificationManager API. Getting active notifications might be useful when you want to save the content in the rich text editor. Before saving the content, you need to make sure that there are no active notifications that require a correction from the user.
To display all of the active notifications, begin by updating the index.html file by adding a button to show active notifications:
<body>
  ...
  <br />
  <p>Custom Actions</p>
  <button onclick="showSuccessNotification()">Show Success Notification</button>
  <button onclick="showErrorNotification()">Show Error Notification</button>
  <button onclick="getNotifications()">Get Notifications</button>
  <br /><br />
  <p>Active Notifications</p>
  <code id="active-notifications-box"></code>
</body>


<p data-line="263" class="sync-line" style="margin:0;"></p>Add the getNotifications function under the script tag in the index.html file:
<script>
  ...
  // 1
  function getNotifications() {
    const notifications = tinymce.activeEditor.notificationManager.getNotifications();
    const activeNotificationsBox = document.getElementById("active-notifications-box");
    // 2
    activeNotificationsBox.innerText = JSON.stringify(notifications);
  }

  function showSuccessNotification() {
    const notification = tinymce.activeEditor.notificationManager.open({
      text: "A custom success notification",
      type: "success",
    });
  }

  function showErrorNotification() {
    const notification = tinymce.activeEditor.notificationManager.open({
      text: "A custom error notification",
      type: "error",
    });
  }
</script>


<p data-line="292" class="sync-line" style="margin:0;"></p>In the above code:
- You define a getNotifications function, in which you refer to the TinyMCE editor (tinymce.activeEditor), and call the NotificationManager (notificationManager) API's getNotifications method.
- You display the notifications by updating the activeNotifcationsBox's innerText property.
Finally, save your progress and visit the localhost URL to test the getNotifications function.
Real world example
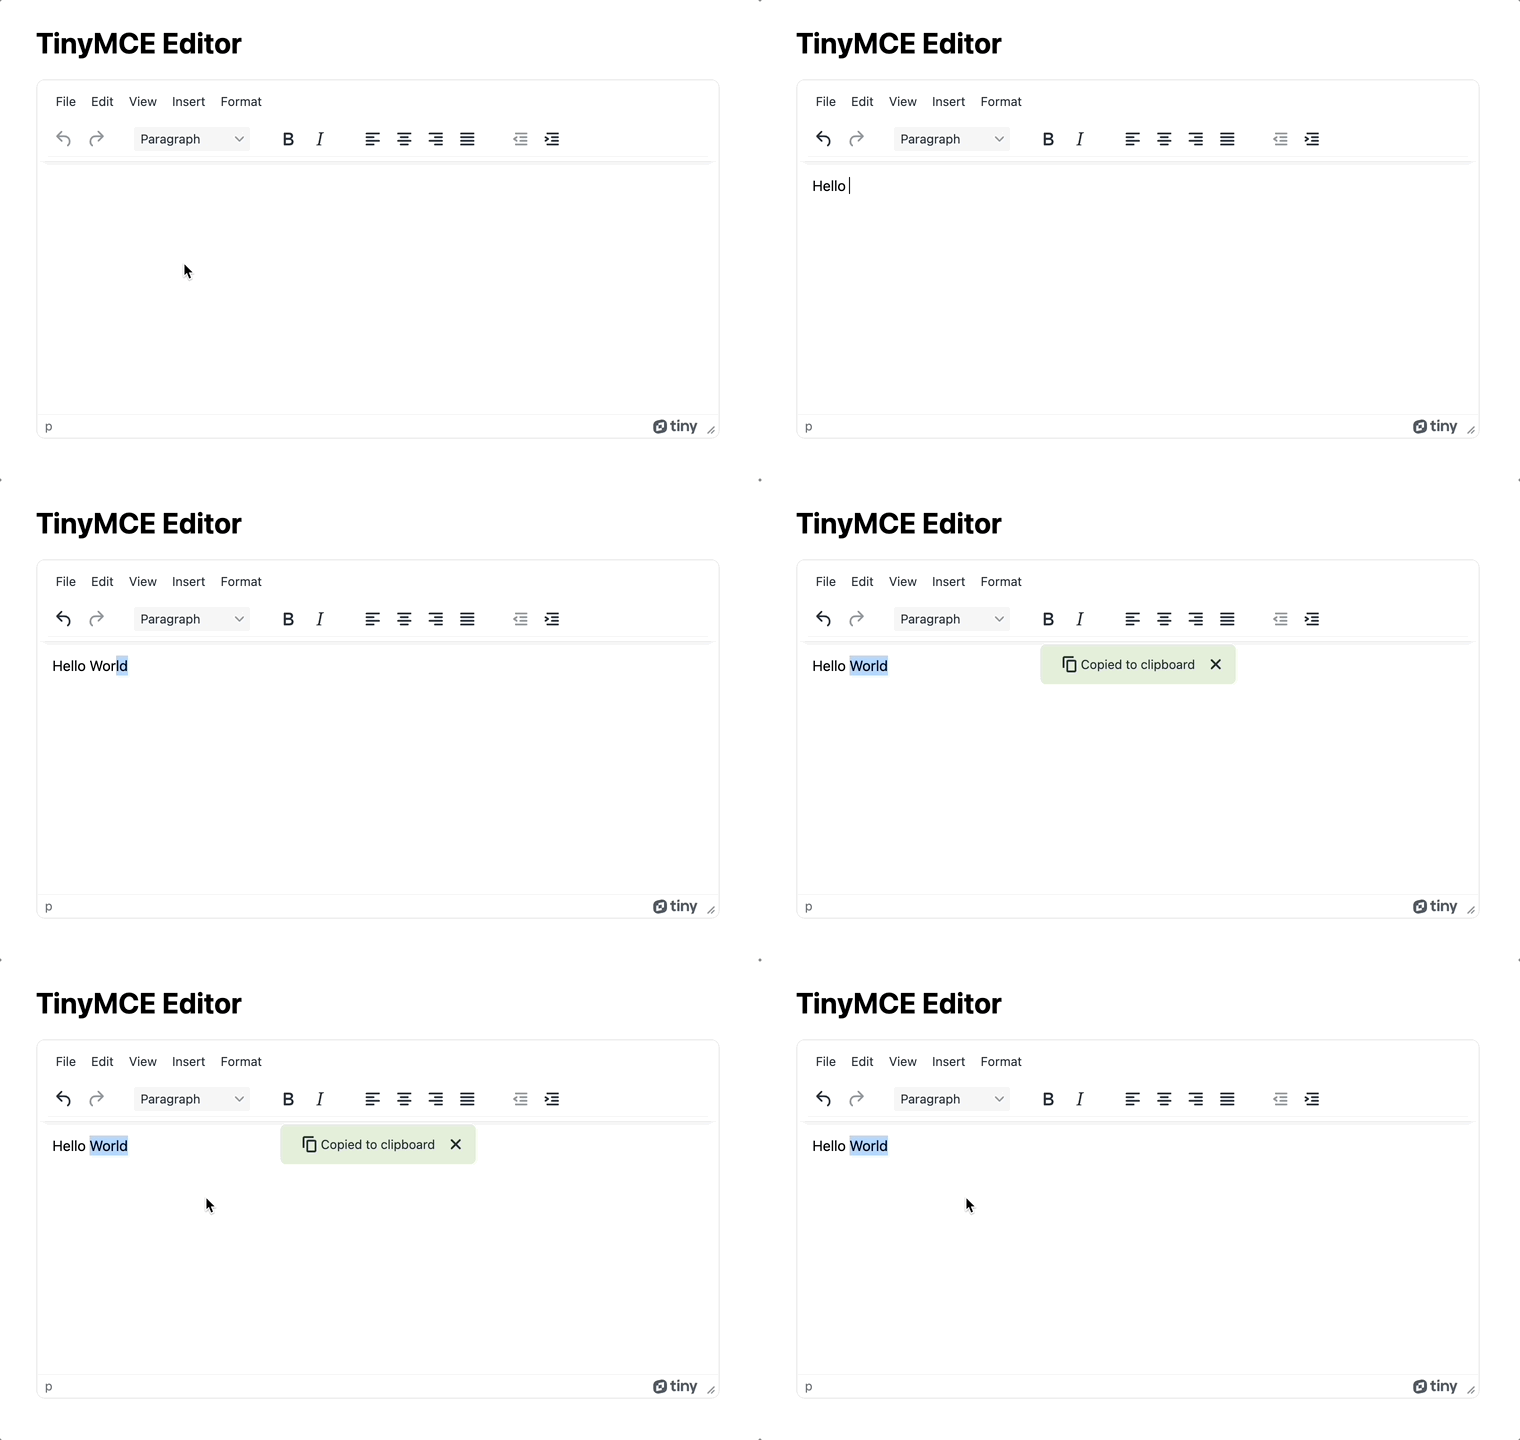
One of the most common operations in a text editor is copying content. It can be helpful to show a “Copied to clipboard” notification when a user copies some text.
To display a notification like this in the TinyMCE editor, begin by updating the TinyMCE initialization method (tinymce.init) under the script tag in the index.html file:
<script>
  ...
  tinymce.init({
    selector: "textarea#my-textarea",
    // 1
    setup: function (editor) {
      // 2
      editor.on("copy", function (e) {
        const notification = editor.notificationManager.open({
          text: "Copied to clipboard",
          type: "success",
          icon: "copy",
          timeout: 3000,
        });
      });
    },
  });
</script>


<p data-line="328" class="sync-line" style="margin:0;"></p>
In the above code:
-
You add the callback function to the setup property of the TinyMCE instance (tinymce.init).
-
In the callback function, you create a notification by referring to the TinyMCE editor (editor) parameter passed by the setup's callback function, and call the NotificationManager (notificationManager) API's close method on (editor.on) the copy event.
Save your progress and visit the localhost URL to test your notification, which should now display when you copy the text using Ctrl+C or Cmd+C.
Notifications in action
The NotificationManager API simplifies the process of creating in-app notifications. You can use the API to make a stark user interface less hostile and instead become more open, where sharing useful information within the app is commonplace.
TinyMCE allows developers to use a best-in-class text editor right out-of-the-box, or to create a fully customized experience and extend the basic functionality. Contact the support team if you need more information about Notifications or TinyMCE’s APIs
