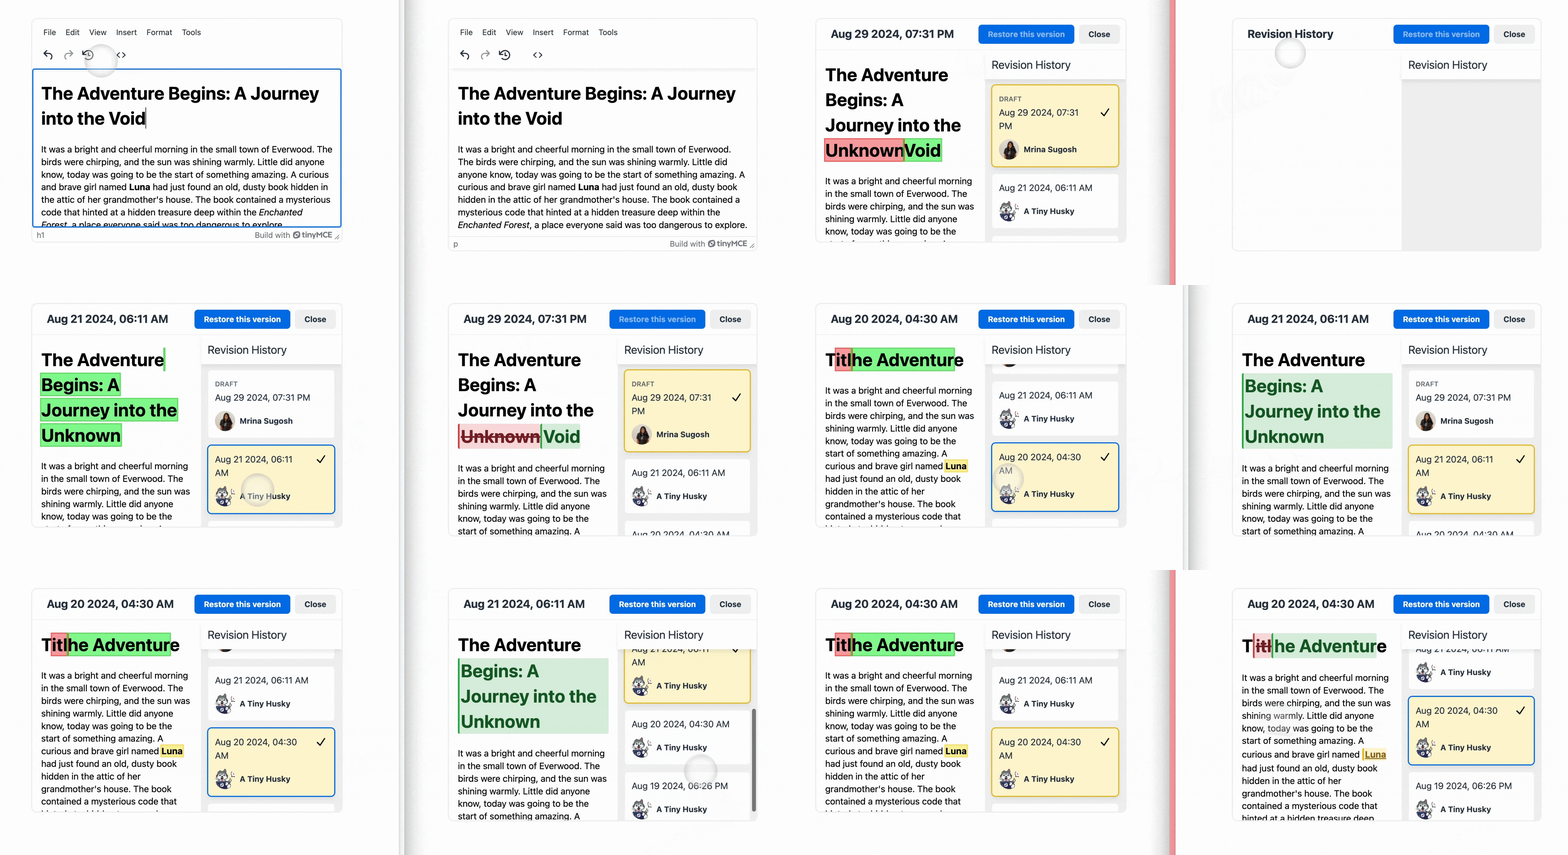
In our recent series of blogs, we've covered everything from the complete setup of the TinyMCE Revision History plugin to more advanced features like implementing lazy loading and adding author information. Now, we’re taking it a step further by focusing on how you can customize the appearance of revision annotations using CSS.
This guide will show you how to enhance the visual presentation of added, removed, and modified text, making it easier for users to track changes and ensuring the styling aligns with your brand.
Understanding the TinyMCE Revision History plugin
The Revision History plugin allows users to view and manage changes made to the content within the TinyMCE editor. It records revisions and provides a timeline view where users can navigate through different versions of the document. Each change is visually represented, highlighting text insertions, deletions, and modifications.
Why customize the Revision History interface?
While the default styles provided by TinyMCE are functional, they might not always blend seamlessly with the rest of your application’s UI. Customizing these styles can provide a few benefits:
- Brand Consistency: Ensure the revision history matches your brand’s colors, fonts, and overall design language.
- Improved Readability: Modify text sizes, colors, or spacing to enhance the readability of revisions, especially in content-heavy documents.
- Enhanced User Experience: Tailor the user interface to make it more intuitive and user-friendly, aligning with your application's unique needs.
Getting started with custom CSS for Revision History
To start customizing the Revision History plugin, you’ll need to apply your CSS styles to the appropriate elements. We’ll implement custom styles to the different types of changes (added, removed, and modified text) in the revisions.
Step one: Identify relevant selectors
TinyMCE’s Revision History plugin applies specific classes to the content that has been added, removed, or modified. By targeting these classes, we can customize the appearance of these changes. Below is our CSS code for this guide and example. For real world projects, you can adapt from your own provided CSS styles.
Step two: Write your custom CSS
Here’s the custom CSS code that styles the added, removed, and modified text within the revision history:
/* Styles for added text */
.added {
    background-color: #d4edda; /* Light green background */
    color: #155724;            /* Dark green text */
    text-decoration: none;     /* No underline or other text decoration */
    border-left: 3px solid #28a745; /* Green border to the left of the added text */
    padding-left: 2px;         /* Padding to separate the text from the border */
  }

  /* Styles for removed text */
  .removed {
    background-color: #f8d7da; /* Light red/pink background */
    color: #721c24;            /* Dark red text */
    text-decoration: line-through; /* Strike-through to indicate removal */
    border-left: 3px solid #dc3545; /* Red border to the left of the removed text */
    padding-left: 2px;         /* Padding to separate the text from the border */
  }

  /* Styles for modified text */
  .modified {
    background-color: #fff3cd; /* Light yellow background */
    color: #856404;            /* Dark yellow/brown text */
    text-decoration: underline; /* Underline to indicate modification */
    border-left: 3px solid #ffc107; /* Yellow border to the left of the modified text */
    padding-left: 2px;         /* Padding to separate the text from the border */
  }

  /* Optional: General styles for all annotations */
  .added, .removed, .modified {
    font-weight: bold; /* Make the annotated text bold for emphasis */
    border-radius: 3px; /* Rounded corners for a nicer appearance */
    display: inline-block; /* Ensure that the styles apply to inline elements properly */
    margin: 2px 0; /* Small margin for spacing between lines of annotated text */
}Step three: Add the custom CSS to TinyMCE initialization
In your TinyMCE initialization script:
- Add the
revisionhistory_css_urloption to point to your custom CSS file - Use the
revisionhistory_diff_classesoption to map the plugin’s internal classes to your custom classes
Here’s how a TinyMCE initialization looks:
tinymce.init({
  selector: "textarea",
  plugins: "code revisionhistory",
  toolbar: "undo redo revisionhistory | code",
  revisionhistory_fetch,
  revisionhistory_fetch_revision,
  revisionhistory_author: {
    id: "mrina.sugosh",
    name: "Mrina Sugosh",
    avatar: "./mrina_sugosh.png",
  },
  revisionhistory_display_author: true,
  revisionhistory_css_url: "./revisionhistory.css",
  revisionhistory_diff_classes: {
    addition: "added",
    removal: "removed",
    modification: "modified",
  },
});
Step four: Test your configuration
After updating your TinyMCE configuration, load your editor and test it by making changes to the content. Verify that the added, removed, and modified text are styled according to your custom CSS.
By following these steps, you can effectively apply your custom styles to the TinyMCE Revision History. This makes content changes visually distinct and consistent with your desired look and feel.

Customizing the TinyMCE Revision History plugin with your own CSS styles is a powerful way to ensure that the visual presentation of content changes aligns with your brand's identity and enhances the user experience. By tailoring the appearance of added, removed, and modified text, you can make revisions more readable, intuitive, and consistent with the rest of your application.
Wrap up: Revision History is flexible
The ability to customize and extend your TinyMCE rich text editor is one of its greatest strengths. Whether you're adding new features, like author information, or simply tweaking the appearance of existing ones, TinyMCE gives you the flexibility to create an editing experience that perfectly suits your needs.
If you found this series helpful, please subscribe to the TinyMCE YouTube channel for webinars, tutorials, and more!
Thanks for joining us during this four-part tutorial on Revision History. Check out the other segments from this series:
