Designers and developers use formatting to make websites visually appealing, because we know that great visual design matters. But managing the small steps needed to get there often involves some repetitive action – reapplying the same formatting to web page elements again and again.
Instead of making the changes over and over again, you can automate that effort with the TinyMCE Formatter API. It’s one of TinyMCE’s APIs that manage specific formats used inside the rich text editor area. This guide explains how to manage the Formatter API.
Why automate textarea formatting?
The ability to change text to bold is a ‘format’. When formatting content, if you want the text bold, you highlight it, and press the Bold button on the menu bar (or the Ctrl + b key combination to save time).
TinyMCE has a format available for each style change, which allows you to write your own custom formats for different purposes. And it’s our Formatter API that manages these text changes, behind the scenes.
What’s useful is that you can make an API call with the Formatter, and one of it’s API methods, and take direct control of the text format inside the TinyMCE textarea. For example, if you have a format that you need to reuse often in your writing (let’s say a code block with green text), you can create the green code format, and apply it as needed with one API call. By triggering the API by a button in the UI, or in a menu item, you've automated some important styling. And automation saves your team time and resources.
What you can do with the Formatter API
Some of the essential methods to know when completing any Formatter API testing, are the following:
- The has() method helps you identify if a specific format name is already in use.
- The closest() method checks what formats are currently applied to a selection inside the textarea.
- The canApply() method checks if you can style a specific selection of content or not.
- The register() method introduces your new format to TinyMCE.
- The apply() method adds the format to content inside the textarea.
- The get() method to see the elements of a format.
Getting a grasp of these methods is essential. You can see the complete list of methods in the TinyMCE Formatter API documentation.
Formatter API management: using the essential methods
How to use the has() method
The has() method indicates if a specific format is in use or not. You can check the formats that come built into the TinyMCE editor, such as bold or italics.
tinyMCE.activeEditor.formatter.has("bold");
true;
The response is a boolean – either true or false.
If you have content in a text area, and you want to see the name of the exact format that has styled the content, then select or highlight the area, and run the closest() method to see what is there. One example to explain the method: if you have some bold text, and you think the format is bold, but it could be something similar like “strong”, run closest() to check an array of names, and find the correct one.
tinyMCE.activeEditor.formatter.closest(["bold", "bolded", "strong"]);
("bold");
The method will return ‘null’ if no format is detected, and will return the name of the format if it exists, and has been applied to the text area content.
How to use the canApply() method
If you need to check first if a selection highlighted in the TinyMCE text area can have a format applied to it or not, use the canApply() method to find out. TinyMCE returns a boolean result to confirm if you can apply the intended style to the target or not.
tinyMCE.activeEditor.formatter.canApply("greencode");
true;
You can confirm what the contents of a specific format are using the get() method. This only requires the name of the format you want to check up on in a string, and it will return an object and array describing the style of the format set up:
tinyMCE.activeEditor.formatter.get("greencode")[
  {
    inline: "code",
    styles: {
      color: "#028A0F",
    },
    deep: true,
    split: true,
  }
];
This can be useful if you need the exact styles applied to a format in an array. As for the remaining methods, the following quickstart guide shows an example of how these methods work.
A Formatter API quickstart guide
For this API quick start guide, you can make use of this TinyMCE fiddle, or sign up for a FREE API key and try this one for yourself on your own desktop.
To create a custom format:
-
Select the inline element you want to style, and the style you would like to see (this is an important first step).
-
Create an array with the key and value pairs to represent the inline element and style:
{
   inline: 'code',
   styles: {color: '#028A0F'}
});This will create a code block with green font color.
-
Wrap the inline element and style inside the formatter register method:
tinymce.activeEditor.formatter.register("greencode", {
  inline: "code",
  styles: { color: "#028A0F" },
});
-
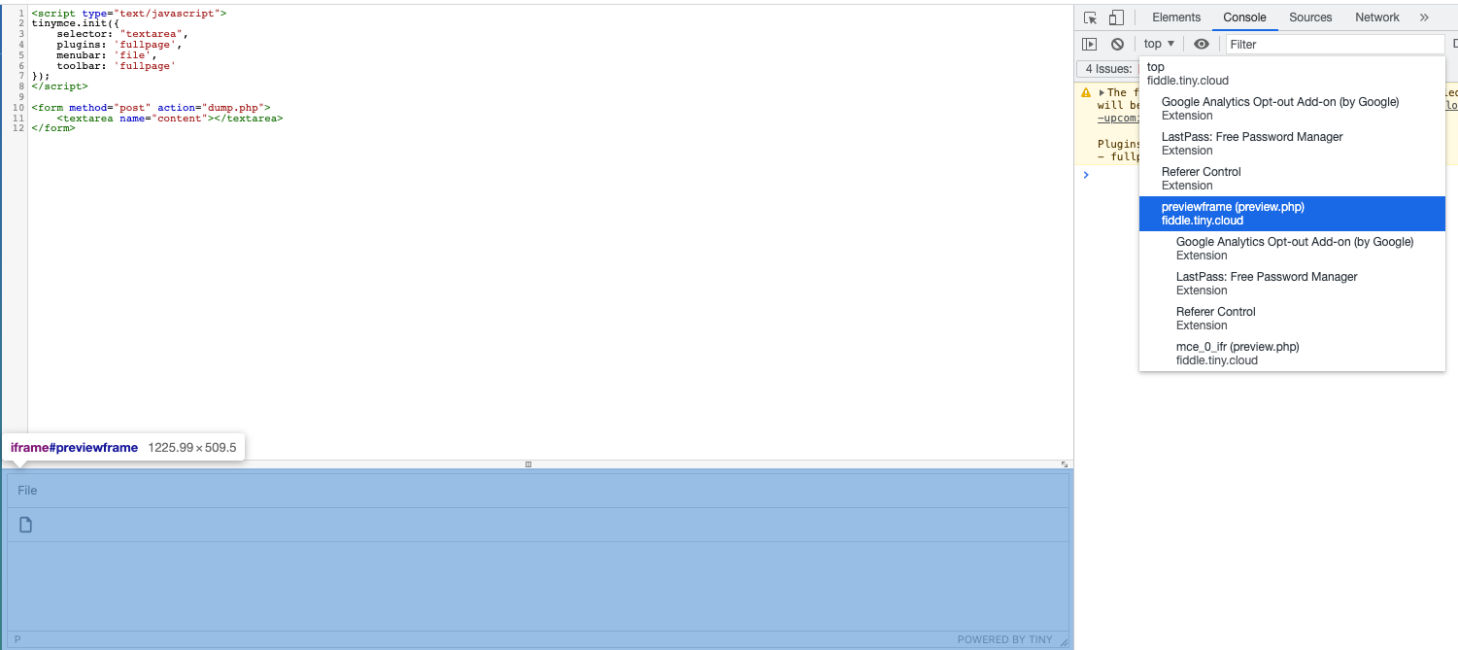
Open the developer tools, and select the TinyMCE rich text editor (if using the fiddle).

-
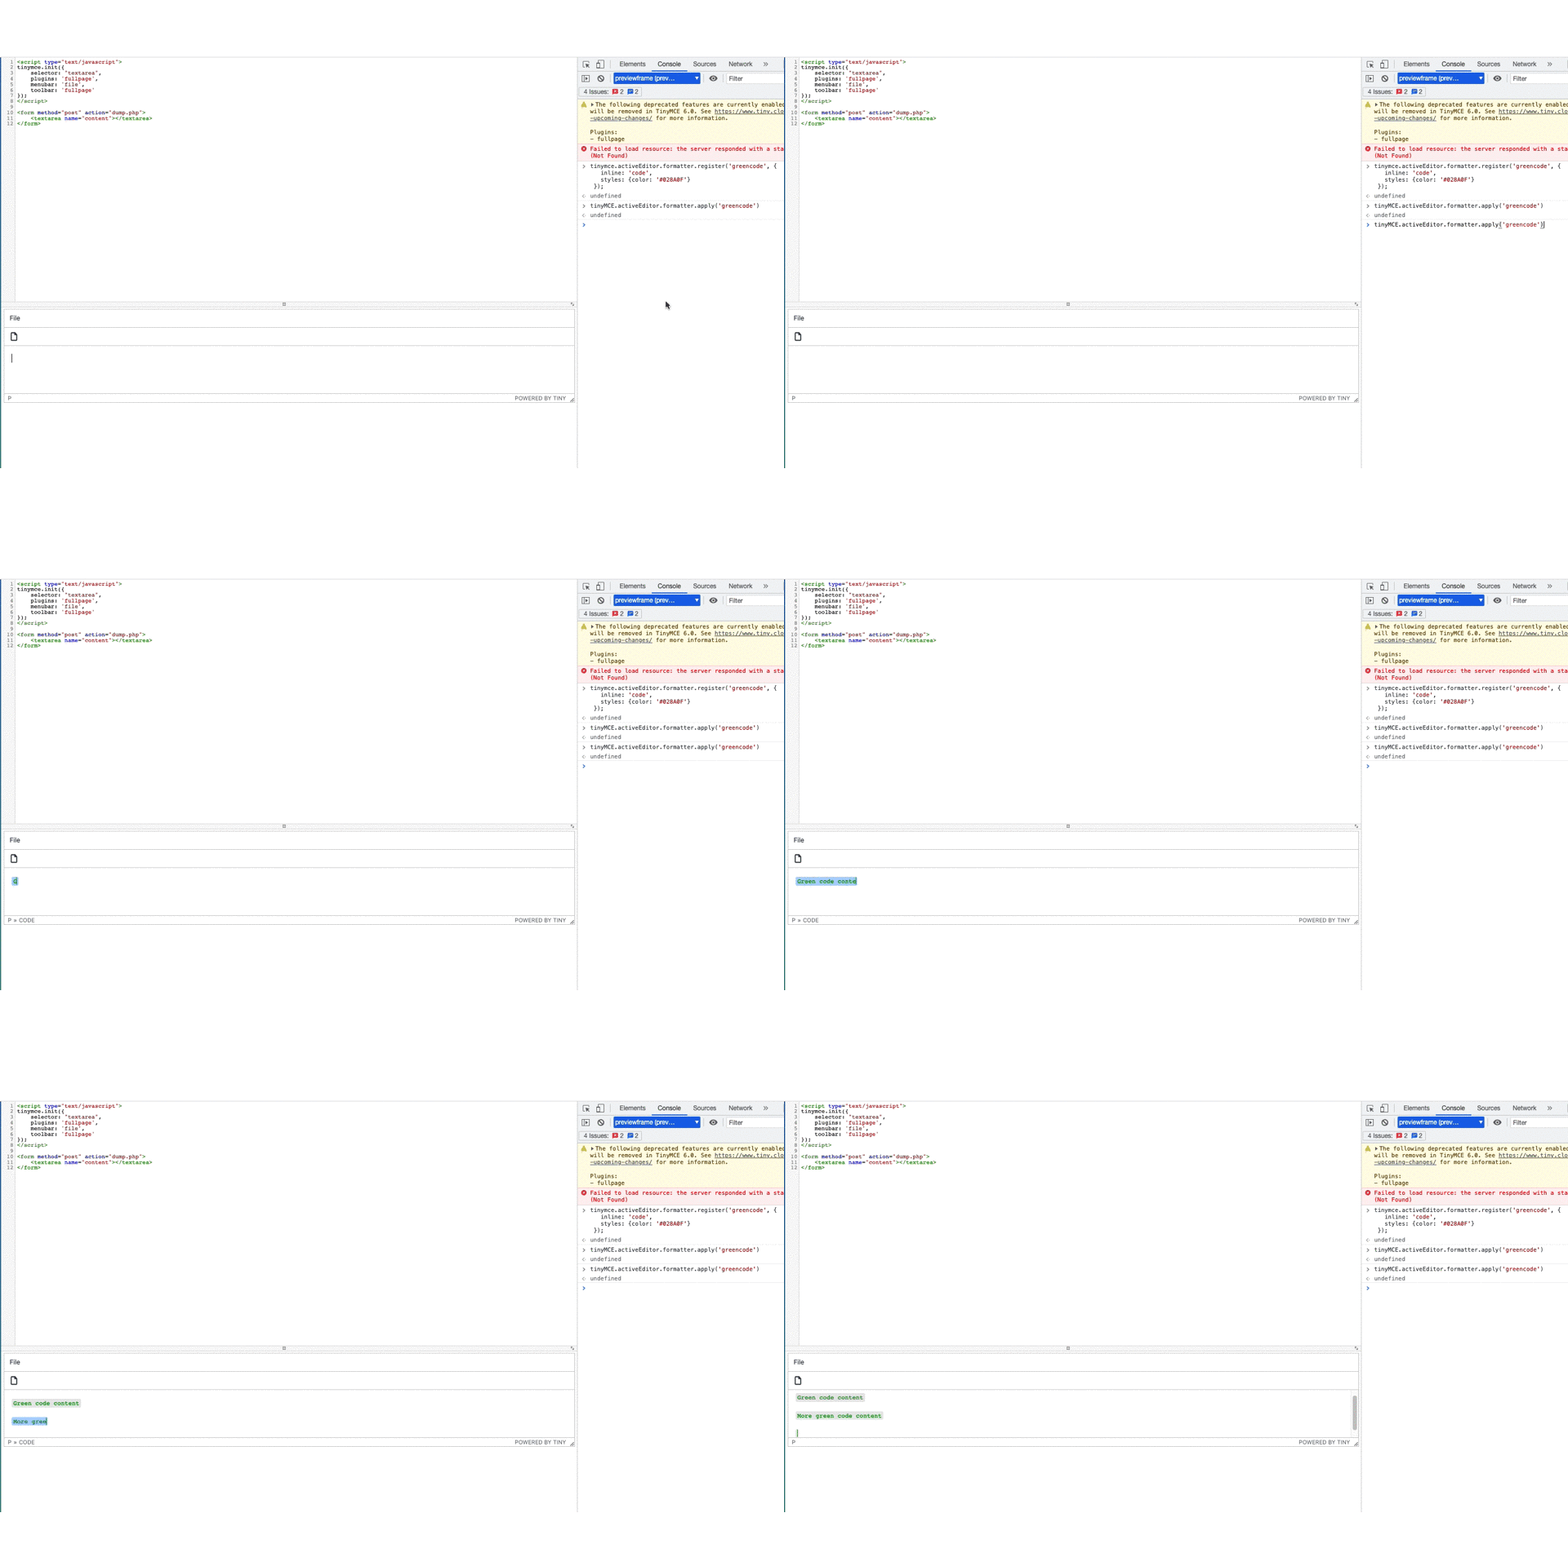
Run the complete API command from step three in the console.
-
Click on the TinyMCE text area, and then run the apply() method to add the style change to your textarea with the apply method:
tinyMCE.activeEditor.formatter.apply("greencode");
-
The textarea will now have a green code block inside it:

Creating an undo level
Applying a new format to the rich text editor automates changes to content. However, creating and applying a format does not create an undo level. This means if you want to revert a change, you'd need to work it out manually.
Thankfully you can set up an undo level for your custom format, and add the format change to the undo stack with the undo manager API. Specifically, run the transact() method with the UndoManager API:
tinyMCE.activeEditor.undoManager.transact(function () {
  tinyMCE.activeEditor.formatter.apply("greencode");
});
In the previous section, you can run this UndoManager API call in place of the formatter call listed in step six to create an undo method when applying your new format. This UndoManager API then creates a bookmark for the formatter you apply.
Where to next in Formatter API management?
It’s vital that you have the ability to quickly modify and style content on your website, to make it visually appealing. That’s why the Formatter API was created. It gives you the ability to quickly automate significant formatting and style changes, which in turn saves you production and development time..
To find out more about textarea formats and styling in TinyMCE, check on the custom formats example in the Tiny docs.
You can get started with TinyMCE today by signing up for a FREE API key, and then trying out a different style to make your content more appealing.
