

We joined MLH Global Hackweek for AI/ML to show how to build an AI-powered email newsletter editor using TinyMCE and Windsurf AI. This guide expands on that workshop with a step-by-step walkthrough, helping you set up a newsletter email editor.
Each step will guide you through setting up a rich text editor with plugins and how to use Windsurf AI prompts to implement these features. Whether you're designing a newsletter, marketing email, or transactional message, this guide provides everything you need to create a fully functional, AI-enhanced email editor.
Watch the workshop for a quick introduction, then follow this guide for detailed implementation.
Why Use Angular for an Email Editor?
Angular provides a structured way to build an email newsletter editor by managing application logic, data flow, and UI components, while a rich text editor component handles text editing and formatting. With Angular’s component-based approach, features like text editors and actions buttons can be organized into reusable parts. Two-way data binding enables real-time updates without extra code, and built-in API support makes it easy to connect the editor to email services or backend systems. By handling state management and UI updates efficiently, Angular helps developers build a scalable and maintainable email editor component.
What is Windsurf AI?
Windsurf AI is an AI-powered coding assistant that helps developers write, debug, and optimize code faster. It provides real-time suggestions, automated code generation, and AI-driven refactoring, making development more efficient.
When building an email editor, Windsurf AI can quickly generate the setup code for integrating TinyMCE into an Angular application, reducing the time spent on configuration. It assists with implementing best practices, handling API connections, and automating repetitive coding tasks. By leveraging Windsurf AI, developers can focus on building features rather than troubleshooting setup and integration issues.
Integrate Windsurf AI into your Angular app
To get started with Windsurf AI, follow the official Windsurf Getting Started Guide. This guide walks you through installation, onboarding, and key features like Cascade (an AI-powered chatbot that we will use in this guide), Memories (code context engine), and the built-in terminal for running commands.
Steps to Install Windsurf AI:
- Download and Install: Visit the Windsurf AI website and install the version compatible with your operating system (Mac, Windows, Ubuntu, or other Linux distributions).
- Onboarding: Once installed, follow the onboarding flow to configure settings and integrate it with your development environment.
- Sign Up or Log In: Create a Codeium account (if you don’t have one) and authenticate Windsurf AI.
- Configure Settings: Import existing configurations from VS Code or Cursor, select keybindings, and set up your preferred editor theme.
- Explore Features: Try AI-assisted coding with Cascade, run commands in the built-in terminal, and customize settings for an optimized workflow.
By setting up Windsurf AI, you can use its capabilities to automate integration tasks, generate code snippets, and enhance the development process within Angular and TinyMCE projects.
Step one: Setup your Angular project
If you’d like to set up an Angular project from scratch, you can follow along with our tutorial here on setting up Angular Reactive Forms Project. However, for this guide, we already have a GitHub repository with the necessary configurations in place. We'll start by checking out the tinymce-textarea branch and setting up the project from there.
Step one: Clone the repository
Clone the project from GitHub to your local machine.
git clone https://github.com/tinymce/devrel-tinymce-angular-newsletter-email-demo.gitStep two: Navigate to the Project Directory
Move into the project folder to start working inside it.
cd devrel-tinymce-angular-newsletter-email-demoStep three: Checkout the tinymce-textarea Branch
Switch to the tinymce-textarea branch which has the latest updates for this guide.
git checkout tinymce-textareaStep four: Install dependencies and start the application
Install all necessary packages and dependencies required for the project. Run the project locally to preview the TinyMCE email editor in your browser.
npm install and npm start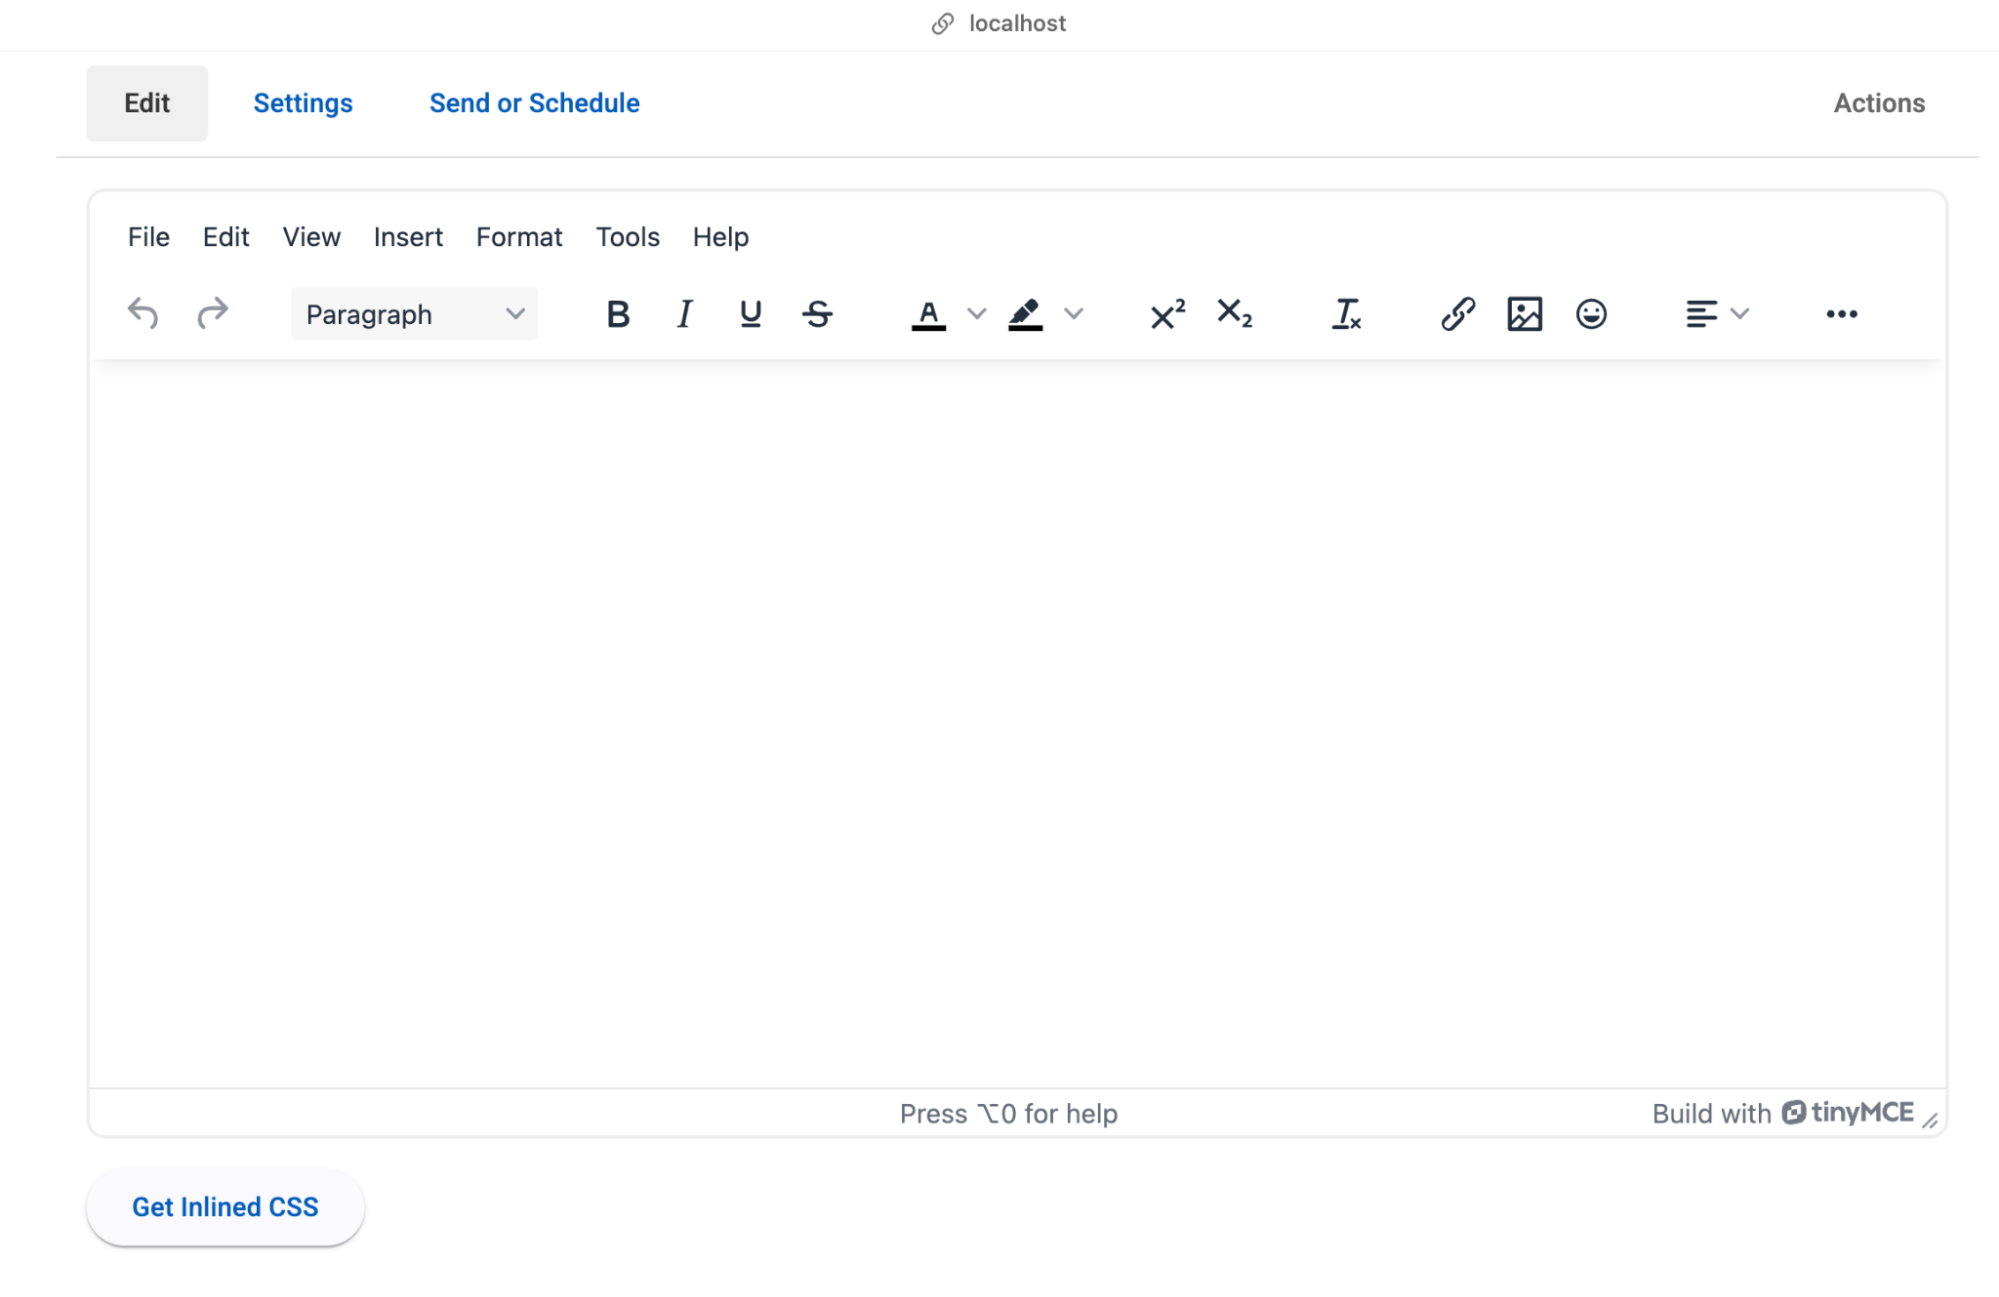
Step five: Sign up for TinyMCE and OpenAI accounts
You may notice that the configuration requires an API key, so completing this step is important for the rest of the guide. Sign up for a TinyMCE account to obtain an API key and an OpenAI account for the AI Assistant in the last steps. Then, store these API keys in the environment file located in the environments folder in the root directory:
export const environment = {
  production: false,
  tinymceApiKey: "INSERT_YOUR_TINYMCE_API_KEY",
  openaiApiKey: "INSERT_YOUR_OPENAI_API_KEY",
};
Use Windsurf AI for integration
Instead of manually setting up the project, Windsurf AI can automate the entire process, reducing errors and even using best practices. You might prompt Cascade Chat as follows:
"Clone the GitHub repository (https://github.com/tinymce/devrel-tinymce-angular-newsletter-email-demo.git), check out the tinymce-textarea branch, install dependencies, and start the Angular application.";
Step two: Configure TinyMCE in Angular
Configuring TinyMCE for a newsletter form involves setting up the editor layout, defining formatting options, and integrating essential plugins that enhance email creation. We'll start by structuring the editor layout, then add key features such as merge tags, inline CSS, multi-root editing, and finally, an AI assistant to help with in-editor content creation.
Understand the starter code
The starter code initializes TinyMCE inside an Angular component, setting up the basic structure and configurations needed for a newsletter editor in app.component.ts
import { Component } from "@angular/core";
import { EditorComponent } from "@tinymce/tinymce-angular";
import { MatButtonModule } from "@angular/material/button";
import { MatMenuModule } from "@angular/material/menu";
import { FormsModule } from "@angular/forms";
import { environment } from "../environments/environment";
import { fetchEventSource } from "@microsoft/fetch-event-source";

@Component({
  selector: "app-root",
  standalone: true,
  imports: [EditorComponent, MatButtonModule, MatMenuModule, FormsModule],
  templateUrl: "./app.component.html",
  styleUrl: "./app.component.css",
})
export class AppComponent {
  apiKey = environment.tinymceApiKey;
  editorContent = "";

  editorConfig = {
    // TinyMCE Editor Initalization
  };

  getInlinedCSS() {
    //implementation to getInlinedCSS
  }
}
This setup includes:
- TinyMCE integration using
EditorComponent, which provides a rich text editor component that can integrate in different parts of the application if needed. - Material UI components for buttons and menus is what we have included with the starter code. This follows best practices recommended by the Angular team and makes sure that the UI is intuitive and accessible.
- We have also included the
FormsModulefor handling form inputs, which monitors any changes in the editor content and dynamically captures them, making it easy to manage and update text.
Use Windsurf AI for integration
Windsurf AI uses ‘@web’ to search relevant documentation online, providing explanations and best practices directly in the editor. This helps clarify TinyMCE’s toolbar settings by pulling information from official sources. You might prompt it:
"Explain TinyMCE’s toolbar settings, plugin options, and accessibility features within an Angular newsletter editor configuration @web";

Step three: Add Merge Tags
The Merge Tags plugin allows users to insert dynamic placeholders in their content, which can later be replaced with real data when sending emails. This is particularly useful for newsletter editors where placeholders like {{First Name}} or {{Company Name}} can be automatically replaced with personalized information.
Update the configuration
To enable the Merge Tags plugin and customize it for your email editor, configure it as follows:
editorConfig = {
  plugins: "mergetags",
  toolbar: "mergetags",
  mergetags_list: [
    {
      title: "Email tags",
      menu: [
        {
          value: "Recipient.Name",
          title: "Recipient Name",
        },
        {
          value: "Company.Name",
          title: "Company Name",
        },
      ],
    },
  ],
};
Use Windsurf AI for integration
Merge tags require correct placeholder values and configuration to get started. You might prompt:
"Add merge tags in TinyMCE for Angular with placeholders for name and email @web";
The AI will generate a list of useful placeholders for Merge Tags. These tags can then be validated and customized further with your own configurations.
How it Works
Once the mergetags plugin is added, a toolbar button will appear, allowing users to insert predefined merge tags into their content. These tags are displayed as placeholders inside the editor and can be replaced dynamically when the email is generated.
Customize Merge Tags:
- Use the
mergetags_listoption to define a custom list of tags relevant to your newsletter content. - Preconfigure frequently used placeholders to maintain consistency across email campaigns.
- Ensure compatibility with your email service provider by matching merge tag formatting requirements.
For example, a marketing newsletter can include placeholders for recipient names, making messages more personalized. By using the Merge Tags plugin in TinyMCE, you can take the content creation process to another level with dynamic data.
Step four: Add Inline CSS
The Inline CSS plugin lets users extract and apply styles directly within the content, keeping formatting consistent when rendering emails. Why is this important? Many email clients strip external CSS when processing emails, making inline styles a crucial feature—especially for newsletters—for maintaining proper design and readability.
To enable the Inline CSS plugin and configure it for your email editor, update the editor settings as follows:
editorConfig = {
  plugins: "... inlinecss",
};
Use Windsurf AI for integration
Configuring inline CSS manually can be quick but if you don’t remember the plugin you can always prompt Cascade Chat:
"Add TinyMCE’s inline CSS plugin in the project @web";
The AI would enable this plugin by reading the latest docs and add it for you to test in the editor configuration.
Once the Inline CSS plugin is enabled, TinyMCE automatically converts styles from separate CSS rules into inline styles for each HTML element. As a developer, you might want to test this. That’s why we included a "Get Inline CSS button" in the starter code. When clicked, it uses the getContent() method to get a single, self-contained HTML output that meets common email formatting requirements. In a production ready project, it's important and recommended to test the output to confirm it looks correct and matches the expected inline styles.
Step five: Add multi-root editing
Multi-root editing in TinyMCE allows developers to define specific editable regions within a document while keeping the rest of the content non-editable. This is particularly useful in structured content scenarios, such as email templates or CMS-driven content, where only certain sections should be user-modifiable.
To enable multiroot editing and configure it for your email editor, update the editor settings as follows:
editorConfig = {
   editorContent = `
    <table style="background-color: #f9f9fb; width: 100%;" border="0">
      <tr>
        <td align="center">
          <table border="0" width="100%" style="max-width: 660px; width: 100%; background-color: #0b132c; border: 2px solid #eee; border-radius: 8px 8px 0 0; overflow: hidden" cellpadding="0" cellspacing="0">
            <tr>
              <td style="padding: 32px 8px 16px 64px;" width="50%">
                <div class="tiny-editable" style="font-family: 'helvetica', sans-serif; color: #fff; font-size: 16px; line-height: 1.5;">
                  <h1>🤖 The AI Revolution Weekly</h1>
                </div>
              </td>
              <td style="padding: 16px 64px 16px 8px;" width="50%">
                <img src="https://images.unsplash.com/photo-1677442136019-21780ecad995" width="256" height="256" alt="AI Generated Art">
              </td>
            </tr>
          </table>

          <table border="0" width="100%" style="max-width: 660px; width: 100%; background-color: #ffffff; border: 2px solid #eee; border-radius: 8px; overflow: hidden" cellpadding="0" cellspacing="0">
            <tr>
              <td style="padding: 16px 64px 0;" colspan="2">
                <div class="tiny-editable" style="font-family: 'helvetica', sans-serif; color: #243376;">
                  <p style="font-size: 20px; text-align: center;">Hey AI Explorer! 👋</p>
                  <p style="font-size: 20px; text-align: center;">Ready to dive into this week's AI breakthroughs?</p>
                </div>
              </td>
            </tr>
            <tr>
              <td style="padding: 0 64px 16px;" colspan="2">
                <div class="tiny-editable" style="font-family: 'helvetica', sans-serif; color: #243376;">
                  <h2 style="text-align: left; font-size: 24px; color: #335dff;">🎨 Midjourney V6: A New Era in AI Art</h2>
                  <p>The latest version is revolutionizing digital art with unprecedented photorealism and creative capabilities. Artists are creating masterpieces that blur the line between human and AI-generated art.</p>

                  <h2 style="text-align: left; font-size: 24px; color: #335dff;">🧠 GPT-4 Turbo: Smarter Than Ever</h2>
                  <p>OpenAI's latest model brings extended context windows and up-to-date knowledge, making it the perfect companion for complex tasks and creative projects.</p>

                  <h2 style="text-align: left; font-size: 24px; color: #335dff;">🎵 The Sound of AI</h2>
                  <p>From personalized playlists to AI-composed symphonies, music generation models are hitting all the right notes in 2025.</p>

                  <p style="text-align: center; margin-top: 32px;"><a style="background-color: rgb(51, 93, 255); padding: 12px 24px; color: rgb(255, 255, 255); border-radius: 4px; text-decoration: none; display: inline-block; font-weight: bold;" href="#">Join Our AI Community</a></p>
                </div>
              </td>
            </tr>
            <tr>
              <td style="background-color: #eff0f6; padding: 24px 64px;" colspan="2">
                <p style="margin: 0; font-family: 'helvetica'; font-size: 12px; color: #a0a9c5;">Stay curious, stay innovative! 🚀</p>
                <p style="margin: 0; font-family: 'helvetica'; font-size: 12px; color: #a0a9c5;">{{Subscription.UnsubscribeLink}}</p>
              </td>
            </tr>
          </table>
        </td>
      </tr>
    </table>
  `;

  editable_root: false,
  editable_class: 'tiny-editable'
  content_style: `
      body {
        background-color: #f9f9fb;
      }

      /* Edit area functional css */
      .tiny-editable {
        position: relative;
      }
      .tiny-editable:hover:not(:focus),
      .tiny-editable:focus {
        outline: 3px solid #b4d7ff;
        outline-offset: 4px;
      }

      /* Create an edit placeholder */
      .tiny-editable:empty::before,
      .tiny-editable:has(> br[data-mce-bogus]:first-child)::before {
        content: "Write here...";
        position: absolute;
        top: 0;
        left: 0;
        color: #999;
      }
    `
};Use Windsurf AI for integration
Multi-root editing requires careful HTML and CSS structuring. You might prompt with:
"Add TinyMCE in Angular with editable and non-editable sections for newsletter formatting using Multi Root Editing. Change the editable_root: false, editable_class: 'tiny-editable' and add content_style:'' @web”The AI would generate a structured layout ensuring only designated sections are editable. Only do this after you have added the editorContent so the AI configuration matches your content.
How It Works
editable_root: This setting prevents the entire RTE Editor from being editable by default. Instead, only elements with a specific class will be editable.editable_class: Defines a custom class (in this case .tiny-editable) that determines which sections of the content can be edited.content_style: The configuration also needs CSS rules that visually indicate editable areas. We do this in the content style but specifying the look and feel of the editable sections.
RTEs by default are editable everywhere, but that doesn’t necessarily have to be your setup. This multi-root approach is needed for instances like this in email newsletter editors, structured document editing, and even some CMS integrations, where users need flexibility to edit only specific parts of a template without affecting the overall design. It helps maintain layout integrity while still allowing content customization if and when needed.
Step six: Add AI Assistant
In email marketing and newsletters, engaging, well-formatted content is crucial. An AI-powered editor can help generate compelling subject lines, refine messaging, suggest improvements, and automate repetitive tasks like reformatting text or adjusting tone.
Adding an AI assistant to TinyMCE lets users do exactly this. This setup works with OpenAI’s ChatGPT as shown in our demo but also with Azure OpenAI Service, AWS Bedrock, or a self-hosted AI model, giving developers flexibility in choosing an AI provider.
To integrate an AI assistant, configure the TinyMCE editor as follows:
editorConfig = {
  plugins: "ai",
  toolbar: "undo redo | aidialog aishortcuts | ...",
};
Then add an ai_request function that sends prompts to the AI and streams responses back into the editor:
editorConfig = {

ai_request = (request: any, respondWith: any) => {
    respondWith.stream((signal: any, streamMessage: any) => {
      const messages = request.thread.flatMap((event: any) => event.response ? [
        { role: 'user', content: event.request.query },
        { role: 'assistant', content: event.response.data }
      ] : []);

      const requestBody = {
        model: 'gpt-4',
        temperature: 0.7,
        max_tokens: 800,
        messages: [...messages, { role: 'user', content: request.query }],
        stream: true
      };

      return fetchEventSource('https://api.openai.com/v1/chat/completions', {
        signal,
        method: 'POST',
        headers: {
          'Content-Type': 'application/json',
          'Authorization': `Bearer ${environment.openaiApiKey}`
        },
        body: JSON.stringify(requestBody),
        onmessage: (ev: any) => {
          const parsedData = JSON.parse(ev.data);
          if (parsedData?.choices?.[0]?.delta?.content) {
            streamMessage(parsedData.choices[0].delta.content);
          }
        },
        onerror: (error: Error) => { throw error; }
      });
    });
  };
}Use Windsurf AI for integration
Windsurf AI can help set up the AI assistant by generating the right code and handling API requests. A useful prompt might be:
“Add OpenAI ChatGPT into TinyMCE using the AI plugin with my API key (stored in a variable in environment) and use the Chat Completions endpoint in the docs for streaming response @web.”Since emails must fit various styles and branding guidelines, AI can assist by ensuring consistency and suggesting best practices for readability. By integrating an AI assistant into TinyMCE, users can enhance email content directly within the editor without switching between tools or relying on external AI interfaces. For businesses, this means faster content creation, higher engagement, and more effective email campaigns.
Put it all together!
Once configured, refresh your app to see the editor working. Add some initial HTML content from the Multi Root Editing step. Then use merge tags to add dynamic content, add inline CSS to see styling in one html sample, and multi-root editing to control editable areas. Finally, play around with your in editor AI assistant that can help refine text, generate suggestions, and even create content.
What’s next?
Whether you're developing an email newsletter editor for marketing campaigns, transactional emails, or newsletters, the configurations and AI integrations covered here provide efficiency, flexibility, and professional-grade functionality. If you want to explore more, try experimenting with additional TinyMCE plugins, refining AI-assisted content generation, or watching the full workshop for deeper insights.
Stay up to date with TinyMCE’s latest features by checking out the Public Product Roadmap or joining discussions on TinyMCE GitHub. With TinyMCE and Windsurf AI, you have the tools to build powerful, intuitive, and scalable email editing experiences.


