You can always turn off a user interface component if you don’t need to see it. It’s better yet, though, to give your customers the option to show or hide interface components, with a show hide button on click function. But it shouldn't take days to implement. So, here’s a quick how-to on implementing a show hide button on TinyMCE.
You’ve likely come across useful web APIs that extend a component’s behavior. At Tiny, we work to ensure the TinyMCE rich text editor is flexible enough to cater for different use cases…and this how-to guide explains how to use TinyMCE’s APIs to build a show hide button for better user interface control.
There’s one major limit on the scope of this how-to guide. Despite testing out both the inline and iframe options for the TinyMCE rich text editor, this post only focuses on the APIs working with the classic iframe mode. We did this to keep the scope sensible, and because seeing what the show and hide API does in action is clearer in iframe mode.
Why use a show hide button?
Generally, show hide buttons help eliminate distractions, conceal information that's not needed, and allow your customers to control the amount of information that appears in the user interface. This also contributes to accessibility by reducing distractions.
For example, the show hide button in MS Word conceals formatting marks like spaces, tabs, and paragraph markers.
Build a show hide button for TinyMCE
To build a show hide button for TinyMCE, make use of the TinyMCE show API and the hide API methods. These two API methods work when TinyMCE is configured in both the classic iframe and inline modes.
Show and hide divs and the textarea
The show and hide methods can conceal the TinyMCE editor when it’s initialized on a textarea element, and when it’s working with inline mode using HTML elements like a div. Although, when making use of the APIs to build show hide buttons, what the API does in action is more clear in iframe mode. Here’s what happens when the API works:
- In iframe mode, when you specify a target element in the tinymce.init script in iframe mode (for example, by using a tag or class), TinyMCE creates a new element for the TinyMCE to work on
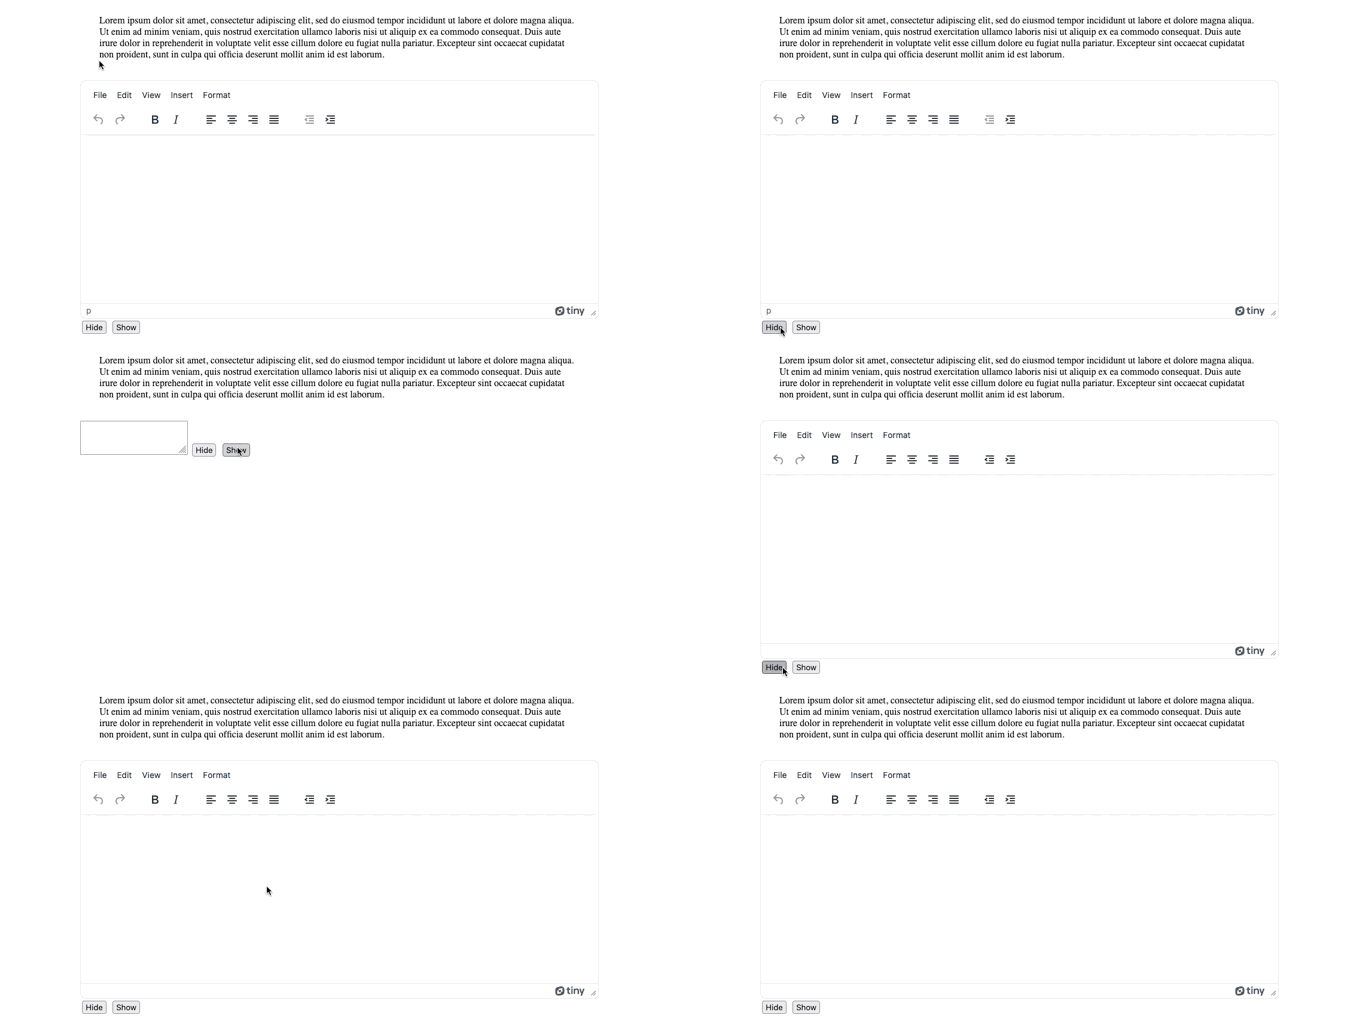
- TinyMCE then hides and conceals the target element
- Running the hide API conceals the editor, and shows the original, target element again.
Creating the show hide button
1. Set up a Tiny script in your html file
For this demo, you can follow along with these steps.There are a few prerequisites:
- A text editor such as VS Code or Zed
- JavaScript and HTML knowledge
- A TinyMCE API key, which you can get for FREE from your TinyMCE dashboard (you can log into your dashboard using Google or GitHub credentials
💡NOTE: Adding your API key prevents TinyMCE from changing into read-only mode when you’re accessing TinyMCE through Tiny Cloud CDN.
Start by creating a new index.html file in your development environment, and copy the following HTML:
<!DOCTYPE html>
<html lang="en">
<head>
    <meta charset="UTF-8">
    <title>Test Focus and Hide</title>
    <script src="https://cdn.tiny.cloud/1/add-your-api-key-!/tinymce/6-dev/tinymce.min.js" referrerpolicy="origin"></script>
<script type="text/javascript">
     tinymce.init({
     selector: "textarea",
        plugins: [
           "advlist autolink lists link image charmap print preview anchor",
           "searchreplace visualblocks code fullscreen",
           "insertdatetime media table paste"
        ],
        toolbar: "insertfile undo redo | styleselect | bold italic | alignleft aligncenter alignright alignjustify | bullist numlist outdent indent | link image"
     });
</script>
<style>
p {
     margin: 2rem;
}
button {
     margin: 0.2rem;
}
</style>
</head>
2. Add API buttons to your web page
Copy the following show and hide button onclick button and HTML content into the demo file body elements. The ‘lorem ipsum’ lines in paragraph tags expand the size of the editor on the demo page, which makes the show and hide button behavior easier to see:
<body>
    <p>Lorem ipsum dolor sit amet, consectetur adipiscing elit, sed do eiusmod tempor incididunt ut labore et dolore magna aliqua. Ut enim ad minim veniam, quis nostrud exercitation ullamco laboris nisi ut aliquip ex ea commodo consequat. Duis aute irure dolor in reprehenderit in voluptate velit esse cillum dolore eu fugiat nulla pariatur. Excepteur sint occaecat cupidatat non proident, sunt in culpa qui officia deserunt mollit anim id est laborum.</p>
    <textarea name="content" id="editor"></textarea>
    <button onclick="tinymce.activeEditor.hide()">Hide</button>
    <button onclick="tinymce.activeEditor.show()">Show</button>
</body>
</html>
3. Test out the show hide button
Save the changes, and then open the demo HTML file in your browser. You can make use of localhost HTTP server for the tests:

Change the show hide button to a scroll event
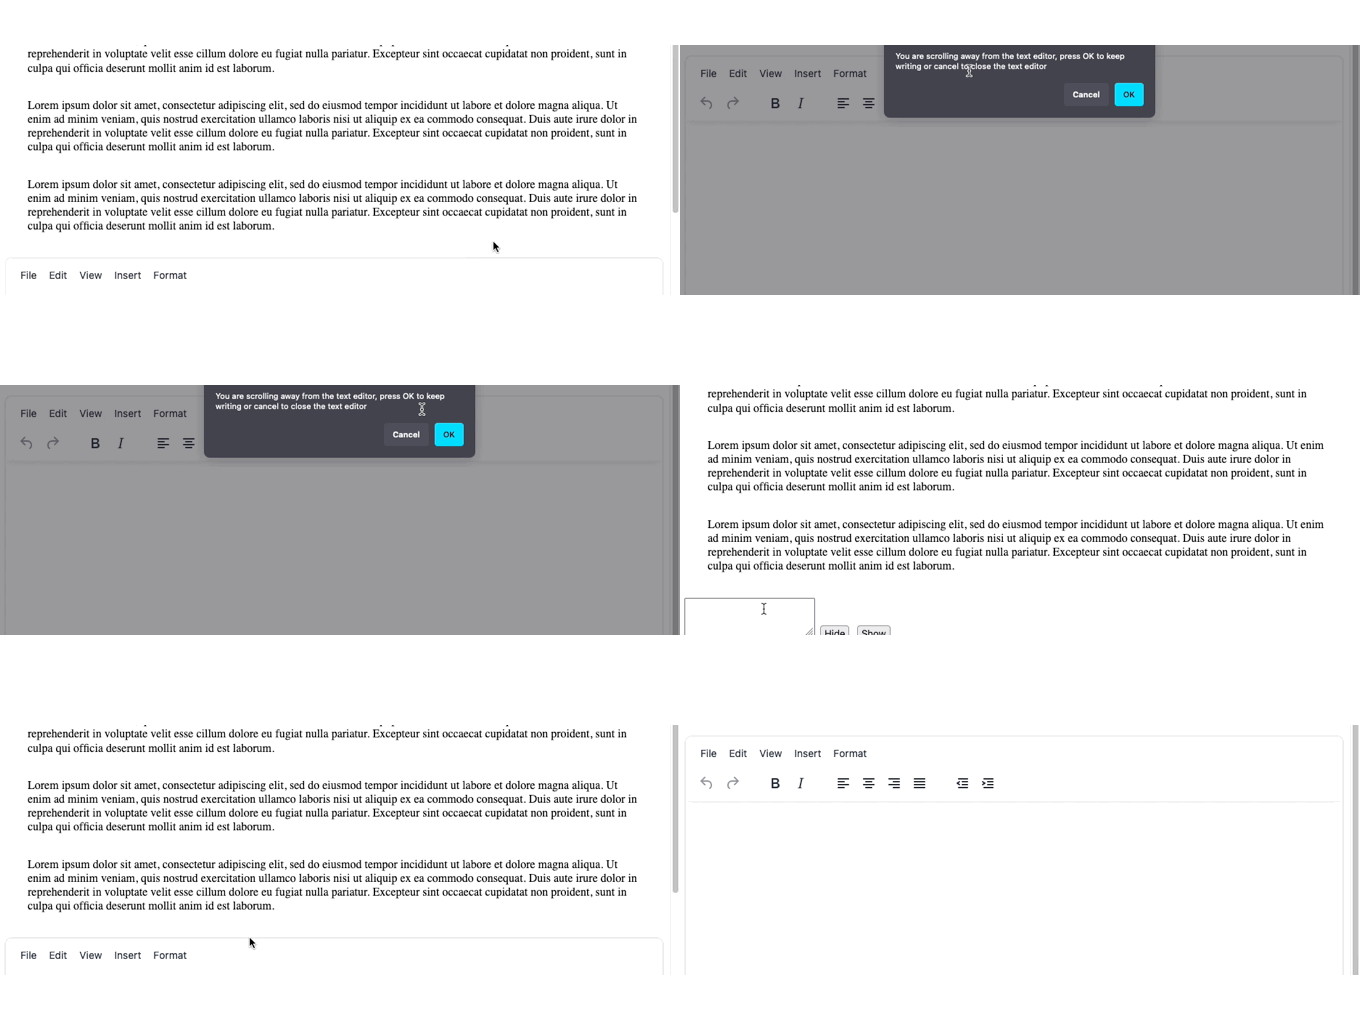
While you can set up the show hide button to work with the onclick event, you can also add a different event listener. For example, the following content when added to the TinyMCE init script, triggers the show and hide behavior when the demo scrolls:
✏️NOTE: The scroll event continues to trigger the event listener in this demo until you click on the cancel button. You’ll need to increase the number of items on the page as well – so that the demo can scroll. Additional ‘lorem ipsum’ paragraphs can increase the page length. Kudos to Millie Macdonald for developing the following JavaScript:
...
        toolbar: "insertfile undo redo | styleselect | bold italic | alignleft aligncenter alignright alignjustify | bullist numlist outdent indent | link image"
});

function isScrolledIntoView(el) {
var rect = el.getBoundingClientRect();
var elemTop = rect.top;
var elemBottom = rect.bottom;

// Only completely visible elements return true:
var isVisible = (elemTop >= 0) && (elemBottom <= window.innerHeight);
// Partially visible elements return true:
//isVisible = elemTop < window.innerHeight && elemBottom >= 0;
return isVisible;
}

document.addEventListener('scroll', function(e) {
                 // Check whether TinyMCE is in view and is visible
                 if (isScrolledIntoView(tinymce.activeEditor.getContainer()) && !tinymce.activeEditor.isHidden()) {
                      checkWithUser = confirm('You are scrolling away from the text editor, press OK to keep writing or cancel to close the text editor');
                      if (checkWithUser === true) {
                          tinymce.activeEditor.show();
                 } else {
                          tinymce.activeEditor.hide();
                          e.target.removeEventListener(e.type, arguments.callee);
                          return callback(e);
                 }
            }
});
</script>You can now scroll down, and see show hide working on a completely different event:

What’s next?
You can find out more about APIs for the TinyMCE editor, and our Premium plugins.
Ask our sales team if you’re looking for something to upgrade your web app. Your API key comes with a 14-day free trial of TinyMCE’s Premium plugins.
