Global businesses frequently need globally consistent spelling, dictionaries and content that’s able to span linguistic and geographic distances. In these cases, multilingual spell checking is essential for users to enter the correct text in online apps or forms. Many developers use the HTML spell checker attribute to handle these needs, but is it sufficient for professional content creation?
The real brains-trust of content creation is your WYSIWYG editor, so it's always best to use one that provides a familiar, easy-to-use interface that's widely trusted in the development community. The TinyMCE WYSIWYG HTML editor is used in 100M+ products worldwide and the core TinyMCE editor is free to use. It also has Premium plugins, like Spell Checker Pro, that add extra value for those needing a professional, enterprise-level experience.
This post compares HTML spell checker and the TinyMCE Spell Checker Pro plugin, demonstrating the value of more advanced spell check functionality. If you’re looking for an alternative to using the simplistic HTML spell checker attribute, Spell Checker Pro could provide everything you need, and with access to the source code, it’s certainly configurable for anything else!
How the HTML spell checker attribute works
The HTML spell check attribute works by defining whether or not an HTML element can be a valid target for spell checking. It's enumerated, meaning there's only a limited set of text-based values the attribute can have configured as an option, which are true or false. For example:
<textarea spellcheck=true> This content can be checked for spelling </textarea>The spellcheck attribute is a global attribute, so it can be added to all HTML elements, but this does not mean it will work on all HTML elements. This HTML spell checker attribute works best on the following elements:
- Text values in input elements (not password)
- Text in textarea elements
- Text in editable elements
If added to most other elements, the element needs contenteditable enabled as well. For example:
<p contenteditable spellcheck="true">Content is everywhere, and spelling errors within that content undermmines credibility.</p>Improved HTML spell checker with TinyMCE
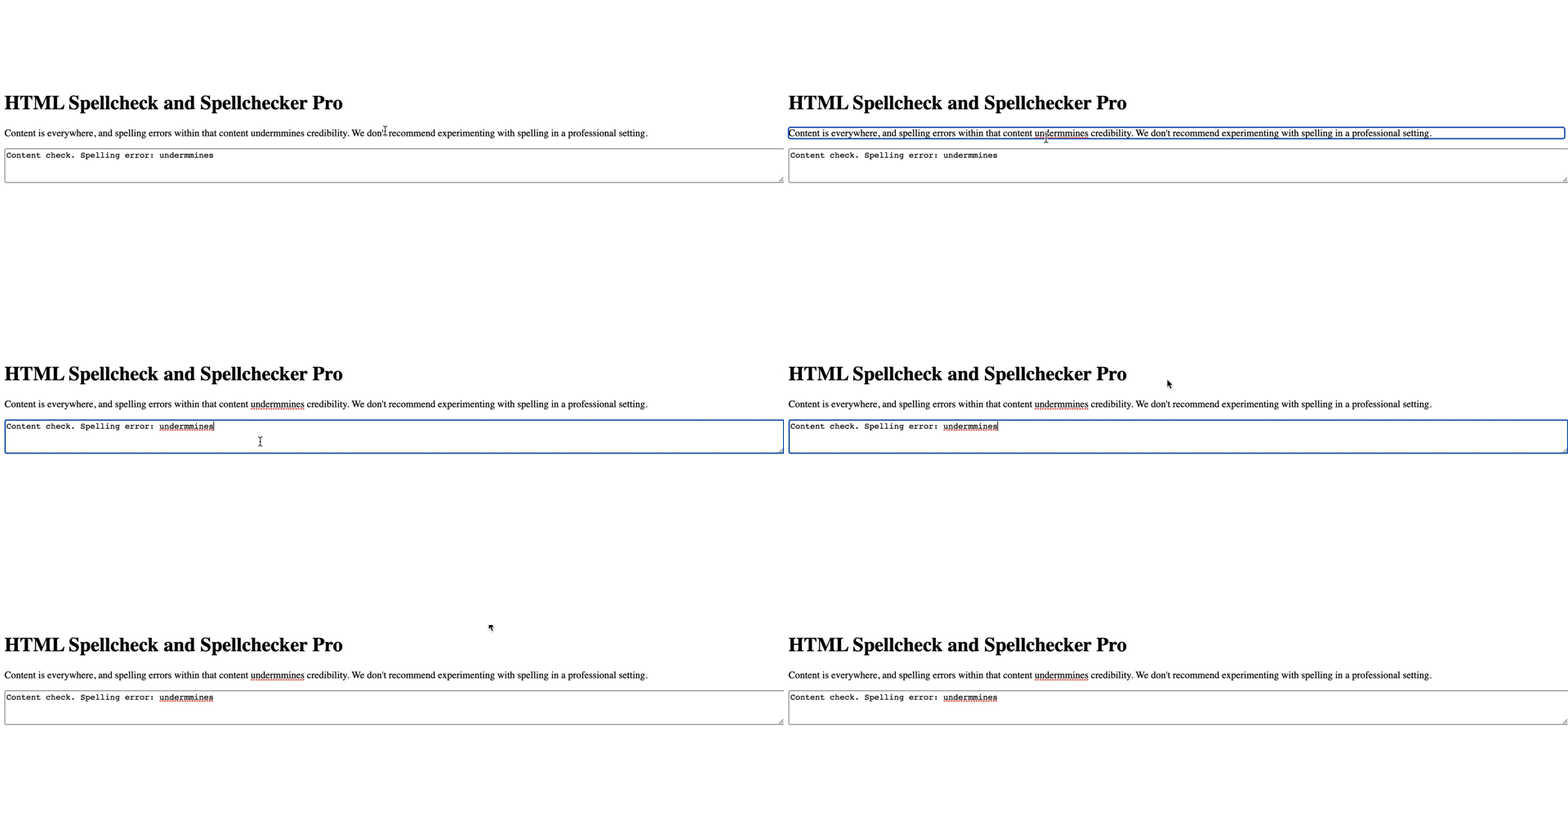
The HTML spellcheck attribute can flag spelling errors with red underlines. That is the extent of the HTML spell checker functionality. You can instead configure the TinyMCE Spell Checker Pro (Premium) plugin for comprehensive spell checking in your textarea.
Benefits of using TinyMCE for spell checking
The main benefit is helping your app’s customers produce content that’s accurate, trusted, and credible, plus easily handle errors. There are other benefits of using the plugin instead of relying on the HTML spell checker attribute:
- Specify an array of words to ignore, or add
- Build a custom dictionary, and make that dictionary available across your organization
- Configure automatic spell checking using events provided by the plugin’s APIs
- A familiar interactive spell checking interface that steps content creators through each misspelled word in the document
- Spelling alternatives provided for each error
- Automatically highlights words that are misspelled (in up to 13 languages at the same time), with users selecting a correction from the suggestions in the context menu.
The next section explains how to configure and enable HTML spell checker with TinyMCE to demonstrate these benefits.
How to enable HTML spell checker with TinyMCE
Start by setting up a demo to test out the attributes. The following procedure provides steps to get this demo for testing up and running.
NOTE: The TinyMCE Spell Checker Pro is a Premium TinyMCE plugin, and you can try out the plugin for 14 days, for FREE, when you sign up for a TinyMCE API key. The key also prevents any domain name errors appearing in the text area when running TinyMCE.
Textarea spell check example usage
The following demo sets up the spell check attribute:
-
Create an index.html file in your development environment, and add the following HTML:
<!DOCTYPE html>
<html lang="en">
<head>
    <meta charset="UTF-8">
    <meta http-equiv="X-UA-Compatible" content="IE=edge">
    <meta name="viewport" content="width=device-width, initial-scale=1.0">
    <title>TinyMCE spellcheck comparison/title>
</head>
    <body>
    </body>
</html>-
Copy and paste the following HTML into the body section:
   <h1 spellcheck="true">HTML Spellcheck and Spellchecker Pro</h1>
    <p contenteditable spellcheck="true">Content is everywhere, and spelling errors within that content undermmines credibility. We don't recommend experimenting with spelling in a professional setting.</p>
<textarea spellcheck="true" class="textEntry0">Content check. Spelling error: undermmines</textarea>-
Add the following style content to the head section of the demo to keep the overall look of the examples aligned, which makes looking at the different spell check options easier:
   <style>
        .textEntry0 {
          width: 100%;
          height: 50px;
        }
</style>-
Save the change, and the test run the demo file by opening it in your browser, or use a local server command with Python or with the PHP command:

What becomes clear at this stage is the following:
- Clicking on the elements activates the ability to edit the contents
- When the contents are available for editing, the spellcheck attribute highlights the errors
That’s the extent of the spellcheck attribute. The next section contrasts this behavior with the TinyMCE Spell Checker Pro (Premium) plugin
Text editor with spell checker
With your demo file open, in the head section, add script tags, and reference TinyMCE Cloud through a CDN link within the script tags. This is what the link looks like:
-
Paste the following script content into the head section of the demo file:
<script
  src="https://cdn.tiny.cloud/1/your-api-key/tinymce/6/tinymce.min.js"
  referrerpolicy="origin"
></script>;
NOTE: Replace the “your-api-key” string with your TinyMCE API key to prevent domain name errors in the text area.
-
Add another pair of script tags, and then copy and paste the following JavaScript - it’s the tinymce.init method:
   <script>
    tinymce.init({
      selector: "#editor",
      plugins: [
        "advlist", "anchor", "autolink", "charmap", "code", "fullscreen",
        "help", "image", "insertdatetime", "link", "lists", "media",
        "preview", "searchreplace", "table", "visualblocks", "tinymcespellchecker",
      ],
      toolbar: "undo redo | styles | bold italic underline strikethrough | alignleft aligncenter alignright alignjustify | bullist numlist outdent indent | link image | spellcheckdialog",
      width: '100%',
    });
</script>-
Add the following textarea element to the body section to give TinyMCE its own textarea element to initialize on:
       <textarea id="editor">
            <p>Content is everywhere, and spelling errors within that content
               undermmines credibility. We don't recommend experimenting with
               spelling in a professional setting.</p>
</textarea>-
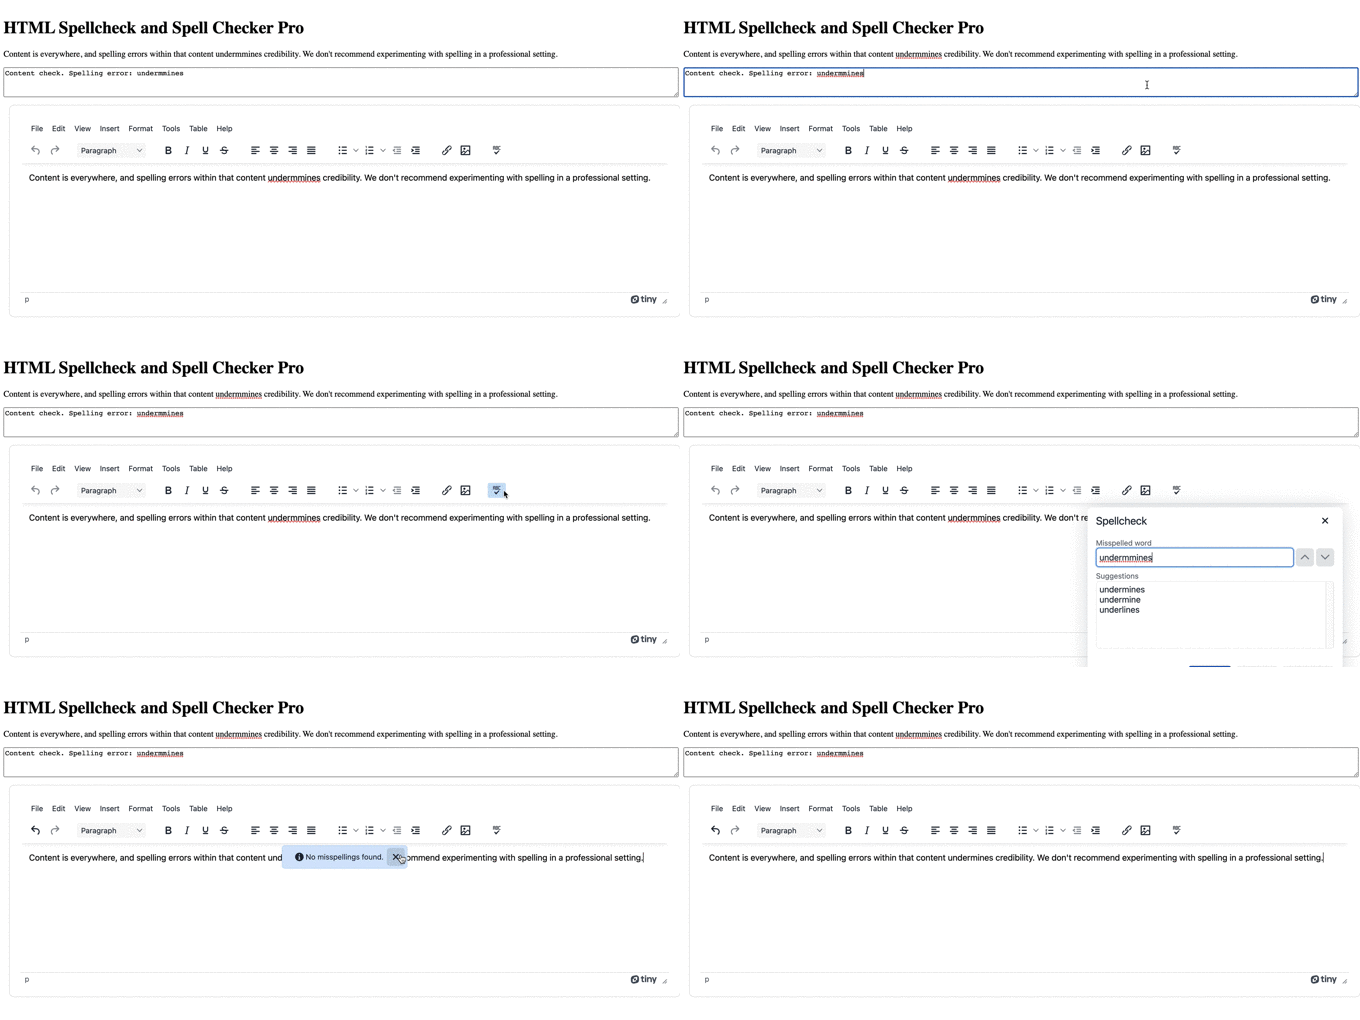
Save the changes, and reload the demo in the browser to check on the comparison:

You can see the benefits of the TinyMCE Spell Checker Pro plugin right away:
- The spelling errors are highlighted by default, not after clicking on the editable text area
- When clicking on the error, a dialog window opens with alternatives to choose from, speeding up the editing process
- The option to change the HTML spell checker behavior is available as well. See the documentation for instructions on how to reconfigure the Spell Checker Pro plugin.
HTML spell check and TinyMCE
If you are building or using enterprise-level products, you may benefit from a quality WYSIWYG HTML editor and a premium HTML spell checker – like TinyMCE and its popular Spell Checker Pro plugin. It provides additional support if you need spell checking that goes beyond the spellcheck HTML attribute.
You can contact us for more information about Spell Checker Pro and configuring content creation solutions in your forms, or your application.
