Work is increasingly more remote. But that’s not great news if your application doesn’t have personalization options, like easy profile images or chat avatars. People increasingly like to see who they’re working with in a Document Management System (DMS). And if you can’t easily make avatars visible in your DMS for commenting and collaboration options, customer requests pile up, and escalate. It doesn't need to be that difficult. .
Making avatars visible in your DMS can be made easier with the help of your rich text editor. For instance, using the TinyMCE rich text editor with the Comments plugin configured makes it super easy to display avatars.
This article explains the steps needed to activate avatars, and the personalizations they unlock in your DMS.
Why make Avatars visible in your DMS?
Avatars have been shown to make people feel closer to one another when collaborating. They can also help you deliver a consistent experience to users across multiple platforms and apps. The same image appearing in different places helps create that sense of consistency.
How to make avatars available with TinyMCE
To start off with, before you can get the Comments plugin working, first, you need an API key. This key gives you free access to TinyMCE Premium plugins for 14 days. Navigate to the Get-tiny sign up page to get your FREE rich text editor API key.
-
In your development environment, create an index.html file and add the following starter HTML:
<!DOCTYPE html>
<html lang="en">
<head>
    <meta charset="UTF-8">
    <meta http-equiv="X-UA-Compatible" content="IE=edge">
    <meta name="viewport" content="width=device-width, initial-scale=1.0">
    <title>Make Avatars available with TinyMCE</title>
</head>
<body>
</body>
</html>-
With your file open, in the head section, add script tags, and reference TinyMCE Cloud through a CDN link within the script tags. This is what the link looks like:
<script
  src="https://cdn.tiny.cloud/1/your-api-key/tinymce/6/tinymce.min.js"
  referrerpolicy="origin"
></script>;
NOTE: For the Tiny Cloud connection, creating an account with TinyMCE gets you a FREE API key. When you use this key, you get access to Premium TinyMCE plugins for 14 days, as well as no warning messages concerning API keys in the text area.
-
Add another pair of script tags, add the following JavaScript. It’s the tinymce.init method, and it’s how you control TinyMCE:
   <script>
     tinymce.init({
        selector: '#editor',
        plugins: "advcode advlist advtable anchor autocorrect autolink autosave casechange charmap checklist codesample directionality editimage emoticons export footnotes formatpainter help image insertdatetime link linkchecker lists media mediaembed mergetags nonbreaking pagebreak permanentpen powerpaste searchreplace table tableofcontents tinycomments tinymcespellchecker typography visualblocks visualchars wordcount",
        toolbar: "undo redo spellcheckdialog  | blocks fontfamily fontsizeinput | bold italic underline forecolor backcolor | link image addcomment showcomments  | align lineheight checklist bullist numlist | indent outdent | removeformat typography",
        height: '700px',
     });
</script>-
Add initial HTML content, and the CSS selector class to some textarea tags. The selector is set as an id with the value “editor” in the TinyMCE init script:
  <form id="post">
    <textarea id="editor">Hello, World!</textarea>
</form>-
Test run the index.html file by opening it in your browser, or use a local server command with Python or with the PHP command:

NOTE: If you receive the error message concerning initializing TinyMCE comments, the following section explains how to initialize TinyMCE comments and make avatars visible for your DMS.
How to make avatars available with TinyMCE
You can make avatars in conversations for your DMS by specifying tinycomments_author_avatar (Embedded mode) or authorAvatar (Callback mode), which offers users a more personal, inclusive, and fun editing experience. For example:
- Embedded mode: tinycomments_author_avatar: "https://yourapp.app/avatars/avatar.png"
- Callback mode: authorAvatar: "https://yourapp.app/avatars/avatar.png"
NOTE: If you aren’t using avatars, as a fallback, the comment author’s initials will be displayed next to their comment, still providing a level of personalization.
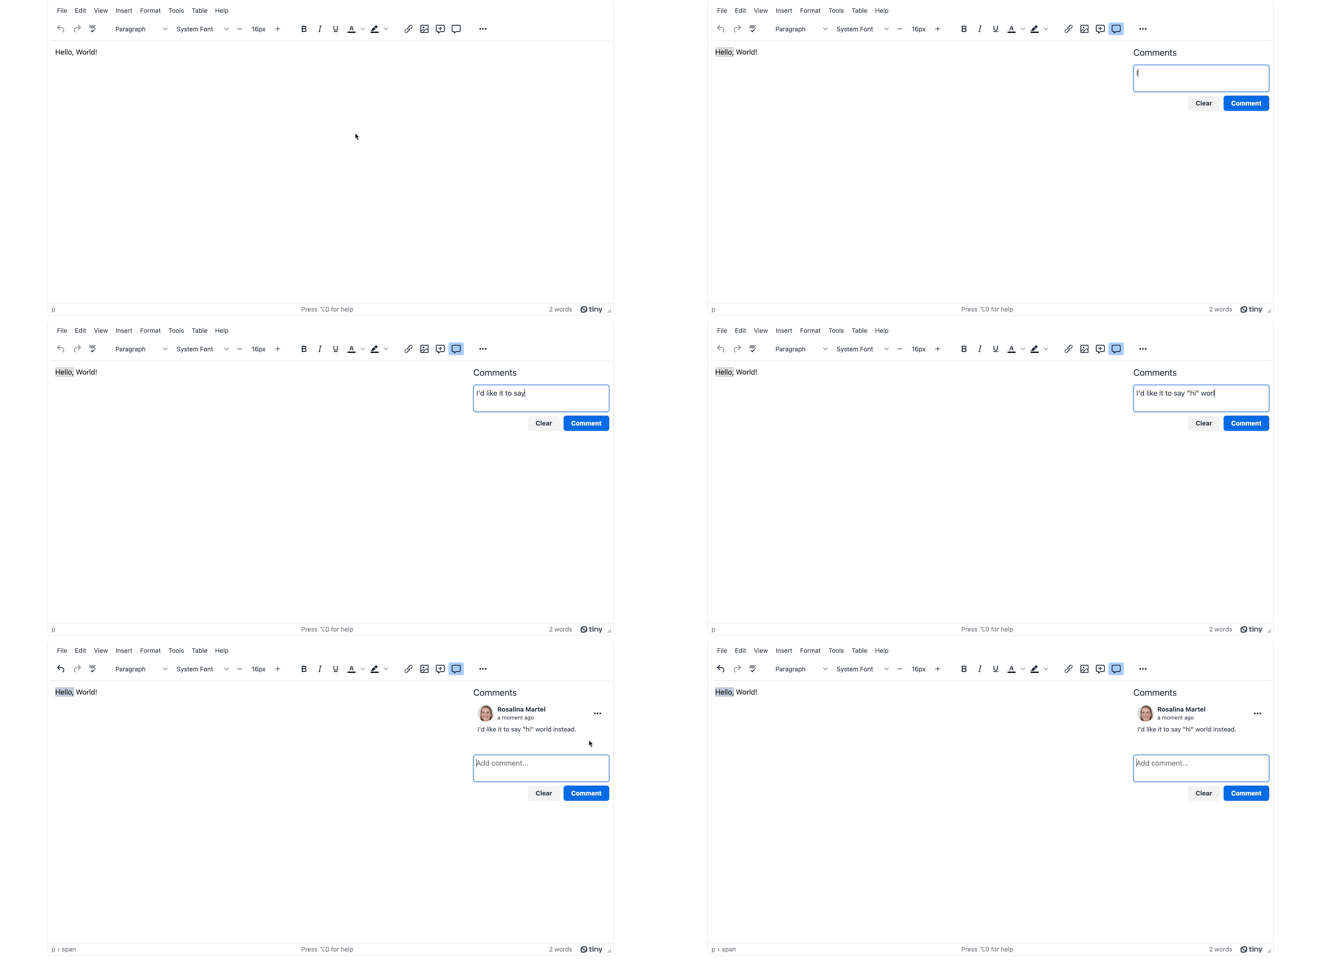
For this demo, the avatars are configured with embed mode:
-
Include the following TinyMCE options to the init script:
tinymce.init({
        selector: '#editor',
        plugins: "advcode advlist advtable anchor autocorrect autolink autosave casechange charmap checklist codesample directionality editimage emoticons export footnotes formatpainter help image insertdatetime link linkchecker lists media mediaembed mergetags nonbreaking pagebreak permanentpen powerpaste searchreplace table tableofcontents tinycomments tinymcespellchecker typography visualblocks visualchars wordcount",
        toolbar: "undo redo spellcheckdialog  | blocks fontfamily fontsizeinput | bold italic underline forecolor backcolor | link image addcomment showcomments  | align lineheight checklist bullist numlist | indent outdent | removeformat typography",
        height: '700px',
tinycomments_mode: 'embedded',-
Configure a demo author with the tinycomments_author and tinycomments_author_name options:
tinycomments_mode: 'embedded',
tinycomments_author: 'rmartel',
tinycomments_author_name: 'Rosalina Martel',-
Make avatars available with the tinycomments_author_avatar option:
tinycomments_mode: 'embedded',
tinycomments_author: 'rmartel',
tinycomments_author_name: 'Rosalina Martel',
tinycomments_author_avatar: 'https://www.tiny.cloud/images/avatars/avatar-RosalinaMartel.jpg',-
Set the sidebar to show comments:
tinycomments_mode: 'embedded',
tinycomments_author: 'rmartel',
tinycomments_author_name: 'Rosalina Martel',
tinycomments_author_avatar: 'https://www.tiny.cloud/images/avatars/avatar-RosalinaMartel.jpg',
sidebar_show: 'showcomments',-
Save the changes, and then you can test out the new configuration for making avatars visible:

Making avatars and comments next steps
In a production environment, configure the TinyMCE Comments plugin to make use of callback mode. This mode connects the comments to the server and database for your application.
You can see a demo with more functionality enabled by checking out the TinyMCE DMS solution, which shows how TinyMCE features and plugins provide a reliable DMS experience for your customers.
