Not everything is created equal… and that statement is just as true when it comes to plugins. So lately, we’ve been publishing a content series on how our TinyMCE plugins compare with other rich text editors.
Testing plugins is standard practice within our product development process. We also regularly have customers asking about how TinyMCE features compare to other rich text editors – so we thought it was time we started sharing our results.
This series tests core features, premium features, and even integrations across the popular editors on the market. The aim is to see who's efforts work out better (depending on your use case) and if they deliver what’s been promised.
Next, we’re looking at a more complex integration – Comments.
What are ‘comments’?
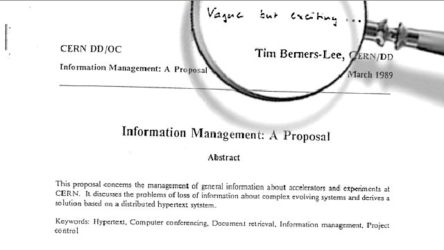
When Tim Berners-Lee first proposed a world wide web, his direct supervisor left a comment on the front page of his proposal. They described the pitch for the internet as: “vague but exciting”. So I think it’s fair to say that comments have been a part of web development since the very beginning – despite the fact that early word processors like the Apple IIe Bank Street Writer were incapable of comments, or even spell checking.
When you work collaboratively using today’s applications like Google Docs or Microsoft Word, you often need to leave comments. So much so, that they've emerged as a vital part of online feedback and editing. They’ve also become an essential part of real time collaboration, which was our initial motivation for comparing what rich text editors have to offer.
How we compared comments plugins
In short, we looked closely at their essential features. To do that, we put together simple rich text editor demos, and compared how the basic features of comments worked across the different rich text editors.
We compared commenting on both text and images, deleting comments, resolving comments, and managing usernames and identification on comments.
Here’s how the web based rich text editors demonstrate the basics of comments:
|
Comment basic features: |
TinyMCE |
CKEditor 5 |
Froala |
Quill |
Slate |
|
Commenting on text and images |
✅ |
✅ |
❌ |
❌ |
✅ |
|
Deleting and resolving comments |
✅ |
✅ |
❌ |
❌ |
✅ |
|
Usernames and profiles |
✅ |
✅ |
❌ |
❌ |
✅ |
There are many different configurations you can write in Typescript files with Slate – including the ability to add comments. However, the abilities you can add to your rich text editor with Slate are not available “out of the box”. You must configure them yourself using Slate objects, like Marks for example, in the Slate framework.
Therefore, for the scope of this comparison, we only compared TinyMCE and CKEditor 5,since the comments plugins are readily available (with some integration).
Commenting on text and images
TinyMCE and CKEditor 5 are all very similar in terms of what you can do straight out of the box for comments. Both projects allow you to set up and try out a demo, and see the comments working right away.
The available demos online were a huge help for our tests:
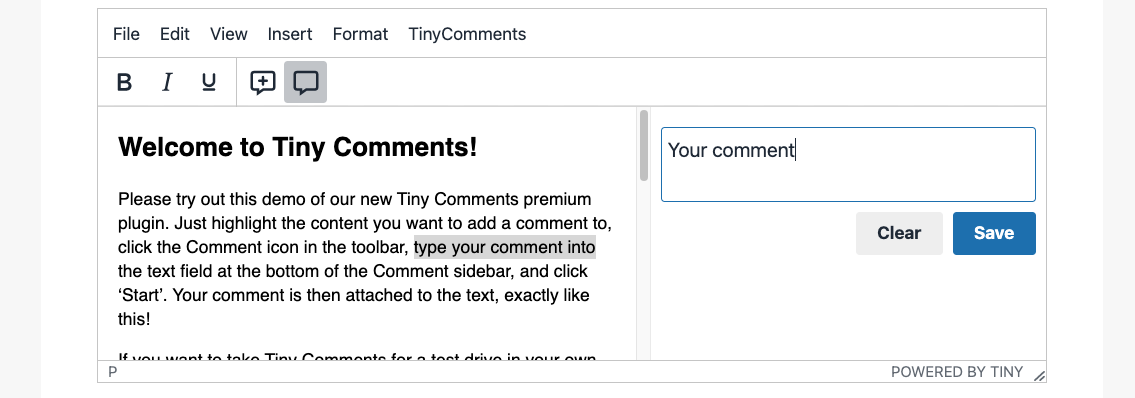
Once the integration of comments into a demo web app was set up, it was possible to comment on both text and images:


Here, the key point of difference was the difficulty (or challenge) of configuration.
Configuring the comments plugin for TinyMCE involved adding the right JavaScript object to the html index file. In contrast, the CKEditor 5 application required several more integration steps.
CKeditor 5 required a modified JavaScript file to import the comments plugin. If you want to try it at home, you need to go to their GitHub page and clone a repository. After cloning the repository, you need to change the CKeditor demo files, including CSS, adding in a class for a sidebar to house the comments on the page.
TinyMCE only requires one specific plugin to be added inside the script tags at the top of the html file:
<script>
tinymce.init({
        selector: '#tiny-ui .editor',
        toolbar: 'bold italic underline | addcomment showcomments',
        menubar: 'file edit view insert format tools tc',
        menu: {
          tc: {
    title: 'TinyComments',
    items: 'addcomment showcomments deleteallconversations'
    }
     },
        plugins: 'paste tinycomments',
        tinycomments_mode: 'embedded',
        content_style: 'body { font-family:Helvetica,Arial,sans-serif; font-size:14px }'
  });
</script>The CKeditor 5 comment integration requires more JavaScript. This extract shows one part of the comments integration content:
ClassicEditor
    .create( document.querySelector( '#editor' ), {
    initialData: appData.initialData,
    extraPlugins: [ CommentsIntegration ],
    licenseKey: 'add-your-ckeditor-licence-key-here',
                sidebar: {
        container: document.querySelector( '#sidebar' )
    },
        toolbar: {
        items: [ 'bold', 'italic', '|', 'comment' ]
    }
    } )
    .then( editor => {
 // After the editor is initialized, add an action to be performed after a button is clicked.
const commentsRepository = editor.plugins.get( 'CommentsRepository' );In the JavaScript content, you can see the sidebar object, which contains the #sidebar class. This is the sidebar CSS required for the CKeditor 5 comments to work correctly in a demo. In a production environment, you would still need to design a sidebar for the comments integration.
Deleting Comments
After we finished configuring comments in TinyMCE and CKeditor 5, the steps to delete a comment were straightforward. Comments created on text or images have a delete button to the right of an edit button, and by clicking the button the rich text editor removes the comment.
Comments are protected. Users cannot just delete at will. For CKeditor 5, you can configure a specific user who has the access rights required to delete comments while other users cannot delete a comment they don’t have the required access rights to delete. Resolving comments functions in the same way. Configuring access rights for a specific user controls who can resolve a comment.
For TinyMCE, deleting comments requires configuring a callback function. That means placing one function inside another – the outer function code works once the inner function code is done. In this case, once the comment delete function is done, the outer callback starts and removes the comment from the text or image. The callback function checks user ids before deleting.
Depending on your needs, if you need your web app running on a remote server or a local machine, both rich text editors offer a workable configuration choice for deleting comments.
Setting up usernames and profiles
For CKeditor 5, creating a file that securely stores usernames and an avatar image is vital for comments to work. In a demo, user information appears in a “users” object. The information stored in the object includes an author id, name, and avatar file in .jpg format.
TinyMCE works by storing user ids and information within a specific conversation. When the user clicks on the comment button and starts a conversation over a text or an image, TinyMCE creates a string for that user, and uses a lookup callback to connect the whole conversation with the users involved.
Similar to the demo, setting up usernames and profiles with TinyMCE comments plugin is a streamlined process.Check out our documentation on configuring callbacks to find out more.
Try Tiny’s Comments Plugin
Check out our Comments plugin page where you can find out more about this premium feature, and run your own pressure test.
If you’ve already integrated TinyMCE as the rich text editor in your application, make sure you have access to our premium features, and then include the addcomment and showcomments plugins to the toolbar, along with the tinycomments plugin:
<script src="https://cdn.tiny.cloud/1/<add-your-api-key-here>/tinymce/5/tinymce.min.js" referrerpolicy="origin"></script>
<script>
    tinymce.init({
    selector: '#tiny-ui .editor',
    toolbar: 'bold italic underline | addcomment showcomments',
    menubar: 'file edit view insert format tools tc',
menu: {
        tc: {
        title: 'TinyComments',
        items: 'addcomment showcomments deleteallconversations’
    }
        },
    plugins: 'paste tinycomments',
    tinycomments_mode: 'embedded',
    tinycomments_author: 'Author',
    content_style: 'body { font-family:Helvetica,Arial,sans-serif; font-size:14px }'
      });
</script>The comments plugin is included in a flexible, Custom plan, which includes all the 14+ premium plugins available on The Cloud Professional plan, and either Tiny Cloud or Self-hosted options.
If you’re not already using TinyMCE, consider integrating it with your applications. Get started with our quick start guide.
Contact us for more assistance or information about comments, or how to get TinyMCE integrated with your applications for the best rich text editing experience.

